I love anything tofu, anything curry, and anything with coconut and/or coconut milk - these things spell comfort for me! The beauty of this recipe is that it combines all of these flavourful and satisfying ingredients in one delightful synthesis for your taste buds (and tum)!
The recipe is easily halved, but I find the full batch disappears quite readily - it's great to pack up for a healthy lunch or dinner.
xox!
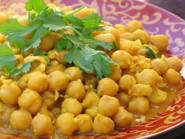
Vegan Coconut Curry
Ingredients:1-350 g package of firm or extra firm tofu, sliced in bite-size strips or cubes
2-3 Tbsp. of Asian Sriracha sauce
2 Tbsp. soy sauce
1-2 Tbsp. olive or canola oil, for frying
1 large onion, cut in strips
1 large red bell pepper, cut in bite-size pieces
1 large ripe tomato, diced
1/2 cup golden raisins, finely chopped
2 tsp. minced garlic
1 tsp. green curry powder
1 tsp. dry ginger, ground
salt and pepper to taste
2 cups frozen green peas
1 can full fat coconut milk
Method:
Mix together the soy and Sriracha sauce and combine with tofu cubes in a small container. If time allows, marinate a few hours in the fridge - one day ahead is ideal. When ready to prepare the dish, reheat large skillet over medium high heat. Add in the oil, and cook the onions until tender (about 5 minutes). When onions are clear and tender, stir in the tomato, bell peppers, raisins, garlic and seasonings - cook 5 minutes longer, stirring occasionally, and turning down heat if necessary (you must take care not to scorch the garlic and onions). Add in the peas, reduce heat to medium low, cover and cook another 2-3 minutes. Finally, stir in the coconut milk, cover once more and cook 3-5 minutes to heat through. Serve over rice - absolutely delicious!
Note: I use about 1/2 tsp. of sea salt in this recipe, and 1 tsp. of ground black pepper - these can be adjusted to taste; the black pepper can be omitted. Try substituting the tofu with cauliflower - so very yummy!