Showing posts with label working women. Show all posts

Tuesday, August 9, 2016

"Jacked" Vegan Bean Pot

By  Pam Hadder
I recently was gifted two vintage ceramic bean pots – my dear friend, Sharmila, is an avid aficionado of vintage and unusual cookware (search Facebook, Kitchenware – Traditional and Unusual).  I had no familiarity with bean pots, but Sharmila’s enthusiasm sparked my interest.  Searching online I found a number of “recipes” for microwave cakes and such, not the slow-cooked, from scratch options I was interested in.
 
I also found a wide variety of opinions on how to soak and prepare beans!  One seemingly reputable government site suggested adding oil to the cooking water, while others suggested a adding a pinch of baking soda.  One home economist suggested cold water pre-soaking for up to 48 hours!  Initially I tried the most common cold water soak, soaking overnight – using the covered bean pot as my soaking vessel, and with the addition of one teaspoon of salt.  This morning, I par-cooked the soaked beans as directed by a few online resources – adding two tablespoons of olive oil and simmering 45 minutes. The aroma was lovely, but the resulting beans were so soft, they were ready for white bean hummus or puree, not bean pot baked beans!  I cooled and bagged them to freeze for later use.

Very glad that I had a second bag of dried navy beans, I started fresh – seeking online information for cooking without overnight soaking. The following is my result – a culmination of conflicting online information, with the added zip of some Jack Daniels whiskey, chilies, bell peppers and fried, smoked tofu to make these vegan bean pot beans really special.  I hope you will try and enjoy, trusting that I have taken care of the leg work for you :)

Ingredients:
450 g/1 lb dry navy beans (no need to presoak)
210g/8 ounces smoked tofu, finely chopped, and seasoned
¼ cup olive oil, divided use
1 large yellow onion, chopped finely
1 large red bell pepper, chopped finely
1 tsp. sea salt
1 tsp. ground black pepper
1 tsp. crushed red chilies
1 teaspoon dry mustard
½ cup black strap molasses
½ cup brown sugar
¼ cup ketchup
1 tablespoon prepared yellow mustard
½ cup Jack Daniels whiskey
2 cups tomato juice (or orange juice)

Method:

Place beans in large soup pot, cover with four inches of water and bring to a boil over med-high heat.  Boil for 3 minutes, remove from heat (I set on back burner, no heat on), cover and let stand 40 minutes. Meanwhile, sauté the chopped onion with bell pepper in 2 tablespoons of the oil until onion is soft and translucent.  In another skillet, brown the chopped tofu in the remaining oil, stirring often.  Season the tofu to your taste with a little salt and pepper – this becomes the “bacon” for your beans.  Drain the beans, rinsing thoroughly with cold water. 

Measure four cups of the beans back into the soup pot. Add the crispy tofu, sautéed onion, and the remaining ingredients.  Stir to combine with a wooden spoon. Ladle the mixture into a 6-cup bean pot. Preheat the oven to 300 degrees Fahrenheit, making sure you have adequate clearance for your bean pot, and adjusting the racks if necessary.  Place the bean pot into the oven and bake for 4-6 hours, checking for doneness at four hours.


You may also wish to add more tomato or orange juice if the beans are still too firm, and extend the baking time accordingly until the desired texture is achieved. I reduced the temperature to 280 Fahrenheit and baked for a total of 7 hours. The baking time can be extended from the onset by reducing the heat to 275-280 degrees and planning for  an 8-10 hour baking time – so by cooking at a slightly lower temperature, beans could go in just before bedtime, and could be warm and ready in the oven for an amazing breakfast or brunch!  

Thursday, December 27, 2012

Chickpeas Please - Yummy Channa Dal!

By Pam Hadder

Indian curries for the holidays? Why not!  My family and friends are eclectic and so is our feast.  This easy and delicious recipe for Channa Dal (spicy Indian chickpeas) can be warmly savoury or fiery hot, depending on your taste.  It's fantastic over rice, with a lush green salad, or in a pita with your favourite greens - you name it, it's simply delish... AND easy to make too.  Here's the recipe for you to try and enjoy xox.


Ingredients: 
2 large cans of chickpeas (about 3 to 3-1/2 cups)
2 medium yellow onions, finely diced
2 cloves minced garlic
2 Tbsp. freshly grated ginger root
2 tsp. turmeric
1 tsp. ground cumin
2 tsp. ground coriander
1-2  tsp. hot curry powder or cayenne (adjust to taste)

2 Tbsp. vegan margarine
2 Tbsp. olive oil
1 cup chopped cilantro (garnish)
Salt, to taste
1 litre vegetable broth

Method:
Rinse and drain the chickpeas.  Place in a medium saucepan with the vegetable broth, stirring in the turmeric, cumin, coriander, and curry. Cover and bring to a boil over medium-high heat.  Reduce heat and simmer loosely covered for 45 minutes, stirring occasionally.


Meanwhile, melt the margarine with the oil in a large skillet over medium-high heat. Add in the onion and cook until soft and clear.  Stir in the garlic and fresh grated ginger and cook a few minutes longer - the onions should be slightly caramelized.   Add the chickpeas and all liquid they are in to the large skillet with onion mixture.  Mix to combine and simmer for another 10-15 minutes.  Serve with cilantro as a garnish.  Finely chopped fresh tomato is also a lovely garnish, as is vegan (non-dairy/no gelatin) yogurt.

Try varying this recipe by adding chopped tomato and cauliflower to the onion and garlic mixture, and by varying the levels of hot curry spice. 

Saturday, October 13, 2012

Gentle Thanks

By Pam Hadder

Thanksgiving has come and gone in a blur of autumn leaves and cool, smokey air.  This year was a particularly fast-forward experience as I continue to fight for space in my life to accommodate my three loves: art, music and the written word.

Other challenges... I am a vegan among omnivores, and I have a very small war-time house - the solution was to cook it all vegan, with the exception of the traditional turkey and gravy, and keep it buffet style!  I just love cooking for a big mess-hall size crowd - I guess the attraction for me is that it accentuates that feeling of community and abundance! Maybe one day I'll have a big kitchen and an expansive dining area where my grandiose culinary imaginations can be unleashed without me feeling like a novice tight rope performer...once false step and... lol

This year I served (all vegan): mashed potatoes, mixed root vegetable bake, dressing, cranberry sauce, mushroom gravy, lentil loaf, spelt berry salad, strawberry spinach salad, multigrain baguettes, assorted pickles and olives; and pumpkin pie with a ginger snap crust and cashew cream topping - oh, and lots of lovely vino, of course! I must say, the feast was tremendously appreciated by everyone, and I had fun preparing it all.

I was a little surprised at how fast the lentil loaf got devoured - I must admit I was hoping for leftovers for Monday's lunch!  And due to requests for the lentil loaf recipe, I am posting it, along with my recipe for mushroom gravy. I hope you will try these great, easy recipes and enjoy them with those who are near and dear to you xoxo.


Holiday Lentil Loaf

Ingredients:
2/3 cup green lentils (uncooked measure)
1 cup finely chopped cooking onion
2 tsp. olive oil
2 cloves minced garlic
2 tsp. summer savory
Freshly ground black pepper, to taste

1 Tbsp. flour
1 tsp. tamari or soy sauce
3/4 cup tomato sauce
3/4 cup finely crumbled multi-grain bread (I use Squirrel Bread)
3/4 finely chopped walnuts (or other favourite nuts)
2 tsp. vegan margarine


Method:
Preheat oven to 350 degrees Fahrenheit. Rinse and clean the lentils; place in a medium pot with about 4-5 inches of water covering them.  Bring to a boil over medium heat; reduce heat and simmer for 25-30 minutes - lentils are ready when they can be easily squished with the back of a spoon; try testing a couple on a small plate if you are not sure of done-ness :)  Drain the lentils well, and set aside.

Meanwhile, heat the oil in a medium non-stick skillet and saute the onion over med-high heat.  When onions are clear and softened, stir in the garlic and cook a few more minutes. Reduce the heat to medium and stir in the flour, seasonings and soy, cooking a few more minutes; stirring constantly.  Then add in the tomato sauce and stir to combine and heat through (about 5 minutes more).  

Combine the cooked lentils, crumbled bread, nuts and tomato sauce mixture in a medium bowl and stir well to combine.  Butter a Pyrex loaf pan with the vegan margarine, and spoon the loaf mixture into the pan; packing it down slightly.  Place loaf in the oven, uncovered, and bake for 25-35 minutes.

Variation: Substitute Italian seasoning mix for the summer savory, and make a topping sauce using 1/3 cup ketchup, 1 Tbsp. brown sugar, 1/2 tsp. dry mustard and a dash of dried crushed red chilies.  Spoon this over the loaf in the pan before baking - great sweet barbecue flavour!

Mushroom Gravy

Ingredients:
3/4 cup of your favourite mushrooms: crimini, morel and shitake are particularly delicious, but white button are fine too :)
1 medium onion, diced finely
1/4 cup vegan margarine, or olive oil
1/4 cup flour
3 cups vegetable stock
1/2 tsp. sea salt
1 tsp. soy sauce
1 tsp. freshly ground black pepper
2 tsp. summer savory or poultry seasoning

Method:
Melt the margarine in a medium non-stick skillet over medium-high heat. Saute the mushrooms and onions.  When mushrooms are golden brown, and onion is translucent in appearance, stir in the flour, soy, salt, pepper and seasonings.  Stir continuously for 4-5 minutes, and then gradually add in the veg broth.  Bring to a boil, stirring constantly, then reduce heat and cover until serving time.  Delicious with lentil loaf, and on mashed potatoes and dressing :)

Tuesday, September 4, 2012

The Chocolate Fix

By Pam Hadder

For those of us that LOVE chocolate, there is nothing quite like the aroma of pure cocoa goodness wafting through the house, married with fresh coffee brewing. 

Yes, every once in a while, this girl needs some
chocolate-themed therapy! Of course, like all sensory moments, it's nicest when shared with a like-minded soul, but if you are flying solo, fear not - baking a decadent treat like this can blossom into a romantic, sensual moment without the commitment and emotional baggage - it's a sticky kiss that is guaranteed to make your heart sing, your lips smile and will leave your head reeling with dreamy thoughts ;)

Whenever you are craving some sweetness, this easy vegan  brownie recipe fills the order and I appreciate that it does not call for any hard-to-find ingredients.  I adapted this recipe from one found on the Vegan Recipes app for iPhone (yes, a fav resource!).

This brownie recipe was a big hit with visiting friends and family - which was a blessing  because the recipe makes a large cake pan (9 x 13) of  brownies!  So the next time I make them, I will likely make half the recipe and will also cut back on the fat by replacing half the oil with some apple sauce or prune purée (too much of a great thing, perhaps?).  Hope you will give this great recipe a whirl and let me know how it goes xox.


Pam's Easy Vegan Brownies

Ingredients:
2 cups all-purpose flour
1- 1/2 cups white sugar
3/4 cups cocoa powder
1 tsp. baking powder
1 tsp. sea salt
1/2 tsp. cinnamon
1 cup chopped walnuts (or pecans)
1 cup canola oil (use half and add 1/3 cup apple sauce or prune purée)
1 cup soy milk (plain, vanilla or chocolate)
1 Tbsp. vanilla extract
1 Tbsp. vegan margarine

2-3 bars Lindt chocolate (dairy free - silver wrapper)

Method:
Preheat oven to 325 degrees Fahrenheit.  Butter a 9 x 13 glass baking dish with 1 Tbsp. vegan margarine, and set aside.  (NOTE: if you are using a metal pan, you can increase the oven temp to 350.)

Combine the flour, sugar, cocoa, salt, cinnamon, nuts and baking powder in a medium-size bowl and set aside.  Mix the oil, soy milk and vanilla extract and stir into the dry ingredients to form a smooth batter. Bake for 35 - 45 minutes - brownies are done when an inserted toothpick comes out clean. Take care not to over-bake, as they should be moist inside - just not raw!

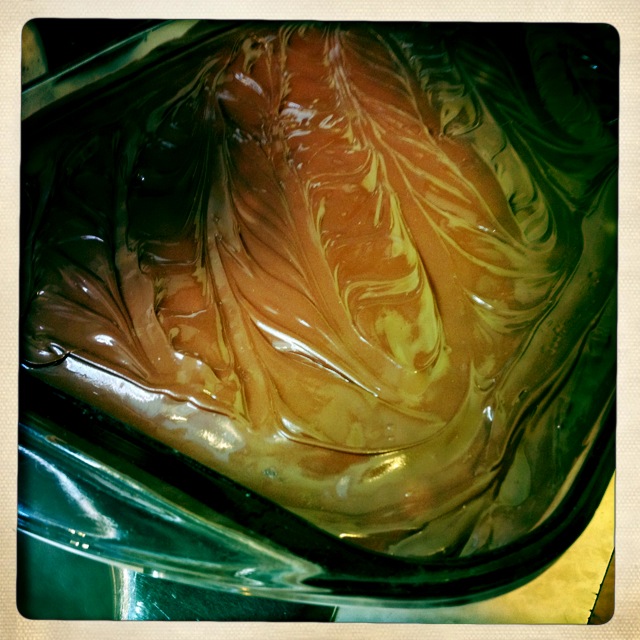
While the brownies are baking, unwrap the Lindt bars and break them into pieces.  As soon as the hot pan comes out of the oven, distribute the chocolate bar pieces over the top.  Once the chocolate pieces are softened (3-5 minutes), spread the chocolate with an icing or butter knife to form the frosting.  To speed the setting of the icing, loosely cover the pan with foil and place in the fridge for 15 minutes.  


The Chocolate Fix

By Pam Hadder

For those of us that LOVE chocolate, there is nothing quite like the aroma of pure cocoa goodness wafting through the house, married with fresh coffee brewing. 

Yes, every once in a while, this girl needs some
chocolate-themed therapy! Of course, like all sensory moments, it's nicest when shared with a like-minded soul, but if you are flying solo, fear not - baking a decadent treat like this can blossom into a romantic, sensual moment without the commitment and emotional baggage - it's a sticky kiss that is guaranteed to make your heart sing, your lips smile and will leave your head reeling with dreamy thoughts ;)

Whenever you are craving some sweetness, this easy vegan  brownie recipe fills the order and I appreciate that it does not call for any hard-to-find ingredients.  I adapted this recipe from one found on the Vegan Recipes app for iPhone (yes, a fav resource!).

This brownie recipe was a big hit with visiting friends and family - which was a blessing  because the recipe makes a large cake pan (9 x 13) of  brownies!  So the next time I make them, I will likely make half the recipe and will also cut back on the fat by replacing half the oil with some apple sauce or prune purée (too much of a great thing, perhaps?).  Hope you will give this great recipe a whirl and let me know how it goes xox.


Pam's Easy Vegan Brownies

Ingredients:
2 cups all-purpose flour
1- 1/2 cups white sugar
3/4 cups cocoa powder
1 tsp. baking powder
1 tsp. sea salt
1/2 tsp. cinnamon
1 cup chopped walnuts (or pecans)
1 cup canola oil (use half and add 1/3 cup apple sauce or prune purée)
1 cup soy milk (plain, vanilla or chocolate)
1 Tbsp. vanilla extract
1 Tbsp. vegan margarine

2-3 bars Lindt chocolate (dairy free - silver wrapper)

Method:
Preheat oven to 325 degrees Fahrenheit.  Butter a 9 x 13 glass baking dish with 1 Tbsp. vegan margarine, and set aside.  (NOTE: if you are using a metal pan, you can increase the oven temp to 350.)

Combine the flour, sugar, cocoa, salt, cinnamon, nuts and baking powder in a medium-size bowl and set aside.  Mix the oil, soy milk and vanilla extract and stir into the dry ingredients to form a smooth batter. Bake for 35 - 45 minutes - brownies are done when an inserted toothpick comes out clean. Take care not to over-bake, as they should be moist inside - just not raw!

While the brownies are baking, unwrap the Lindt bars and break them into pieces.  As soon as the hot pan comes out of the oven, distribute the chocolate bar pieces over the top.  Once the chocolate pieces are softened (3-5 minutes), spread the chocolate with an icing or butter knife to form the frosting.  To speed the setting of the icing, loosely cover the pan with foil and place in the fridge for 15 minutes.  


Tuesday, August 21, 2012

A Little Spice :)

By Pam Hadder

My adventures in vegan cooking continue!  Tonight I was very excited to come across a recipe for vegan ginger cookies and was delighted when they passed the ultimate test - my eleven-year-old son's discriminating taste buds :)

Ginger cookies are his favourite home-baked treat, and the soft, chewy recipe I used to make (Mary Moore cookbook) was a standard in our home.  So, to replace that recipe with a vegan alternative seemed a bit "pie in the sky", however, I tried a recipe from the Vegan Recipes for iPhone app this evening and the rest is history.

I am so happy to share this recipe - not only does it require no exotic ingredients, it's quick and easy to whip up a batch of the dough! The next time I make these, I am going to substitute Malibu Black rum for the 1/3 cup of water...but that's to be continued (wink) - I just think the rum taste would be heavenly with all of those spicy flavours.  I hope you will bake a batch of these amazing cookies, and enjoy them with a great cup of coffee, tea or soy milk xox!

Ginger Molasses Cookies

Ingredients:
3/4 cup softened vegan margarine

1-1/4 cup white sugar (divided use)
3/4 cup molasses
1/4 tsp. sea salt
2 tsp. ground ginger
1 tsp. cinnamon
1/2 tsp. nutmeg
1/2 tsp. cloves
1/3 cup water
1 - 1/2 tsp. baking soda
3/4 cup Thompson raisins, rinsed and drained
2 - 1/2 cups all purpose flour
Candied ginger pieces, cut into small pieces, for garnish (optional)

Method:
Preheat oven to 350 degrees Fahrenheit. Mix together the margarine and 1 cup of the sugar until creamy, then beat in the molasses, salt, and spices until well-combined.  Stir the baking soda into the water and gradually mix it into the margarine mixture.  Add in the flour and raisins, stirring to fully combine - the dough will be moist and slightly sticky. Place the reserved 1/4 cup sugar in a small bowl.  Roll the cookie dough in balls about the size of a large walnut, dip one half in the sugar and place sugar-side-up on aluminium baking sheets; garnish with a piece of ginger in the centre, and place the cookies about 2" apart.  Bake 12 minutes, allowing to cool slightly before removing from baking sheets.  Makes about 36 cookies.

Monday, July 9, 2012

Yummy Vegan Crepes!

By Pam Hadder


My kids and I love going to Kawaii Crepe, and the best part is the vegan versions they have available at all times - that and the bubble tea... oh, and in my case,  the organic coffee... yummmm!


But how to make tasty crepes without eggs... this is a newly acquired skill for me, and one that I was eager to learn, as crepes are a very versatile item.  Sweet or savoury, they are simply delightful - although my preference is definitely skewed toward the savoury ones.... in this case, filled with spinach and mushroomy goodness  :)  


So, here is the best vegan crepe recipe I have found - the flavour is great and there are no hard-to-find ingredients - just simple, straightforward stuff that most of us have at home.  Hope you will try them and let me know about your favourite fillin's and toppings too xo xo xo


Yummy Vegan Crepes

Ingredients - Batter:
I cup all-purpose flour
1/4 tsp. baking soda
1/8 tsp. sea salt
1/2 cup plain, unsweetened soy milk (or almond milk!)
1/2 cup plus 2 Tbsp. water
3 Tbsp. full fat coconut milk
1-3 Tbsp. brown sugar (adjust to your desired sweetness)


Ingredients - Filling:
4 cups fresh spinach leaves
1-1/2 cups sliced mushrooms - any variety, but shitake are especially nice
1 small onion, finely chopped
Salt and pepper, to taste
2 Tbsp. Fresh oregano, finely chopped
1 Tbsp. extra virgin olive oil
1 cup grated smoked Gouda flavour vegan cheese


Method:
In a medium sized bowl, combine the flour, baking soda, salt and sugar.  Then combine the remaining ingredients in a small bowl.  Gradually add the wet to the dry ingredients, stirring to form a smooth batter. Lightly grease a medium griddle - I like the buttery flavour of vegan margarine in this instance.  Heat the pan to medium temperature, and bear in mind that these crepes cook a bit more quickly than other crepes!  


Use 1/4 cup of batter per crepe, making one at a time.  Try and swirl the batter to distribute it as evenly as possible in the pan.  Cook for about one minute or until small bubbles begin to appear on the surface - then carefully turn the crepe with a spatula, cooking the second side until light golden in colour.  Repeat until all batter is used, setting the finished crepes on a plate.


To make the filling, heat the oil in a large fry pan over high heat, and add in the onions, mushrooms, salt and pepper, stirring constantly.  When the onions are soft and clear, add in the oregano and spinach leaves.  Once the spinach is wilted, reduce the heat and fold in the grate cheese - remove from the heat.  Spoon into the prepared crepes and roll - I like to drizzle these with some vegan pesto and a half and half mixture of ketchup and vegan mayo.  The basil flavour and tangy ketchup-mayo sauce really make these crepes extra special.


A simple side salad of fresh greens dressed with a balsamic vinaigrette and a lemon wedge is a nice accompaniment. Enjoy!

Sunday, June 24, 2012

The BEST Frickles!

By Pam Hadder

Frickles, yes, FRICKLES... a good part of my weekend extracurricular activity involved frickles.  Don't have a hot clue what the frick a  frickle is??? Don't sweat it - it seems from my brief survey of friends and acquaintances that people either rave about them,or give you that deer in the head lights look...
For those doe-eyed folks, a frickle is a fried dill pickle and ooooh yesssss they are worth the effort to make.  The ingredients are simple, as is the method - but they are a little time-consuming to make for a big group - for our small dinner get-together, it was manageable.  I have been studying up and comparing recipes and the one that follows is from Rick Browne of PBS TV's "Barbeque America" - I like the beer/mustard coating that precedes the dredging and also love additional crunch of the cornmeal.  The dip recipe is my own concoction.  Hope you will overcome the fear of frying and cook up a batch - enjoy! xox


FRICKLES
Ingredients:
1- 16 ounce jar of dill pickles
1/2 cup yellow cornmeal
1/2 cup all purpose flour
2 Tbsp. of your favourite dry rub spice mix
2 Tbsp. beer
1/4 cup yellow mustard
2-3 cups canola oil
Method:
Drain the pickles in a colander; cut into coins or spears and set aside.  Meanwhile in a shallow dish,combine the flour, cornmeal and dry rub spice. In a small bowl, stir together the beer and mustard.  Dip pickles in the mustard mix; coating evenly.  Dredge the pickles in the flour mix and place on a baking sheet or wax paper covered platter.  Heat the oil in a skillet to 375 degrees (you can also use a deep fryer - just follow the directions for your appliance).  Carefully place small batches of the frickles into the hot oil and cook until the pickles bob to the surface.  Remove with a slotted spoon and drain on paper towels.  Serve with a sauce made from 1/2 cup mayonnaise, 1/2 tsp. coarse black pepper and 1/4 cup ketchup - dill-icious!!!

Friday, June 1, 2012

Spicy Tagine!!!

I must say I am loving trying new vegan recipes, and modifying family staples to suit the veggie preference :) My oldest daughter seems to like sampling my creations, so I have taken to preparing logging camp sized portions of some staples like brown rice!  It just disappears in a couple of days - go figure...


Tonight's dinner consisted of some leftover BBQ tofu, brown rice with peas (see what I mean????) and Spicy Tagine; along with a simple sprout and arugula salad.  


Here is my recipe, adapted from one of my fave vegan recipes sources, Vegan Recipes - the iPhone app.  The beauty of this recipe is that it is full of soluble fibre and protein and that it is quick and easy to prepare.  It also allows for much variation and customization to suit your personal preferences.  I hope you will try this recipe and make it your own - let me know what you think, and if you come up with any more great modifications, please share the good news!  


All I can say is mmmmm magnificent spicy goodness - the aromas in the kitchen are almost as good as enjoying a couple of scoopfuls of this tagine - almost... ;)


Pam's Spicy Tagine

Ingredients:
2 cans of drained and rinsed garbanzo beans (chickpeas)*
3-4 Tbsp. of olive oil
1/2 tsp. paprika
1/2 tsp. ground cumin
1/2 tsp. ground ginger
1/2 tsp. ground cinnamon
3 large ripe tomatoes, diced
2/3 cup tomato salsa
1 red onion, coarsely chopped
1 yellow bell pepper, seeded and chopped
Dried crushed chili flakes, to taste (I use about 3/4 tsp.)
Optional: chopped cilantro and/or parsley for garnish


Method:
Heat the olive oil in a large non-stick pan; stirring in the spices to heat through.  Add in the remaining ingredients and stir to coat in the spices and oil.  Cover and cook 25 minutes, stirring every 5-7 minutes.  


*you can soak 2 lbs of dry chick peas over night and use them instead of canned - I just find the canned are handy for a quick meal


NOTE: I serve the cilantro and/or parsley on the side, as cilantro tends to be a flavour folks either LOVE or HATE (I am a luvr!) This mixture is great on its own, or over fresh salad greens, in a pita, served over rice etc. YUM


Tuesday, December 27, 2011

Selling the Good Stuff!

We passed the big hump! The days are slowly getting longer and I am planning to soak up Summer 2012 - every sun-kissed, delicious moment of it! I make no apologies for my love of summer - it is what it is!

Christmas has been grand - lush, elaborate meals with family and friends, but now it's time to ease out of the flowing holiday clothes and whittle off the extra padding before the warm weather returns.

Inspired by memories of summer, here is my Sunshine Salad - hope you will turn up the heat, put on a pretty sarong and enjoy this summery goodness - even though it's frosty outside... after all, why waste time longing for summer when you can create a bit of that vibe right now?

PAM'S SUNSHINE SALAD

SALAD INGREDIENTS
8 cups salad greens (l prefer romaine or spinach, but Mesclan mix is also nice!)
1 small banana, sliced
1 cup sliced strawberries (or 2 kiwis!)
1/2 cup toasted almonds
I diced avocado
3 ounces crumbled goat cheese

DRESSING INGREDIENTS
1/8 cup balsamic vinegar
1/8 cup extra virgin olive oil
1/2 cup strawberry flavour Greek yogurt (the real stuff, not low fat with gelatin!)
dash salt
fresh ground black pepper, to taste
lime zest or orange zest, to taste

METHOD
At serving time, toss the greens, fruit and avocado with the prepared dressing. Garnish with cheese and almonds - serve immediately. Nice side with grilled chicken or steak - mmm...

Serves 4: Enjoy! xox

Sunday, September 18, 2011

Marvelous MIM!!!

If you are eating low carb and also interested in getting your Omega3s and keeping a healthy degree of fibre in your diet, the Atkin's Muffin in a Minute (MIM) may be just what you're looking for!

Easy to make from scratch (literally 1-2 minutes of prep and 1 minute in the microwave!), the MIM is large, light in texture and tastes great. The photo at left shows 2/3 of the muffin I made today - I had already gobbled the rounded top of it before I thought to share my joy!

By the way, I grind my own flax seed a couple of cups at a time and store it in the freezer - I not only find this to be much more economical, but I find that it also has a far better flavour than the pre-milled flax.

As our mornings get cooler, it's nice to have a quick, hot breakfast alternative - I enjoyed the piping hot MIM today with a bit of my homemade, sugar-free strawberry jam, and I felt very satisfied and spoiled before, during and after :)

NOTE: flax breads are higher in fat, but this is healthy fat that, over time, will improve the texture of your hair, skin and nails. For women of all ages, flax as part of daiy diet can also help with menstrual cramps, and for those age 35+, flax in your daily diet can alleviate "hot flashes" common in perimenopause and menopause. Isn't it nice to have that benefit come to us from healthy, tasty food and not from a hormone pill or injections? Here is the recipe - ENJOY!

Atkins Muffin in a Minute (MIM)

1 large egg
1 tsp. melted butter or canola oil
Few grains salt (optional)
1 pkg. artificial sweetner
1/2 tsp. cinnamon (optional)
1/4 cup ground flax
1/2 tsp. baking powder

Place flax, salt, cinnamon, sweetner and baking powder in a coffee mug, stirring to combine. Add in the egg and butter. Stir well to combine. Microwave one minute on high (adjust more or less, depending on the wattage of your appliance). Remove mug from microwave. Run a butter knife around the edges of the mug to loosen the muffin, and invert it onto a serving dish. Slice, butter and enjoy!

Makes one large muffin. Contains 3.2 grams of carbohydrate, 9.4 grams of fibre, 12.2 grams of protein and 17.3 grams of fat - 235 calories.


Saturday, July 23, 2011

Beet it ;)

I had the very good fortune to receive a bundle of wonderful summer veg today from Stonelane Orchard - they sell their pesticide-free produce at local market gardens; including the St. Norbert Market.

Among the lush kale, chard, tomatoes, peas and so on, was a spectacular, large bunch of red beets with perfect leaves. I said to Stonelane co-owner, Rick, "OMG, these are the most beautiful beets I have ever seen!" and he remarked, simply "Our beets always look like this." Too cute - nice to know that vegetable heaven can be enjoyed here on Earth - at least through the short summer growing season! Needless to say, I was inspired and I couldn't wait to get home and start cooking. I surfed the net for a short while, wondering if I could find something new and exciting, but my tastebuds were yearning for some traditional Russian favourites: borscht and beet leaf rolls (holuptsi)

As things got underway in the kitchen, my daughters began swarming - wondering when the soup would be ready. Nice to be popular- if only for sustainance LOL.

I make my borscht using chicken or vegetable broth, preferring this to the pork-based version my German mother makes (sorry, Mom - just not a pork fan...). Here are the recipes for Beet Rolls and Borcht - I hope you will try the recipes and enjoy some local beets in season.

Pam's Russian Borcht

INGREDIENTS:
Large bunch beets with greens, 6-8 medium-size beets
1 medium onion, chopped finely
3 Tbsp. olive oil
2 cups chopped kale or cabbage
1.5 tsp. salt
Pepper, to taste
1/2 cup chopped fresh dill
3 tsp. sour salt, or to taste
8 bay leaves, or to taste
2 cups diced carrot
1 large tomato, diced
2 cups diced new potatoes
1 can baked beans in tomato sauce
8 cups chicken or vegetable broth

METHOD:
Heat olive oil over medium-high heat in a soup pot, stirring in the onions. Cook onions until clear, but don't brown. Stir in salt, pepper, tomatoes, carrot and potatoes, along with 1/3 of the broth. Cook 15 - 20 minutes. Meanwhile grate the beets and chop the leaves and stems finely - add these to the soup, along with the remaining broth, beans, dill and sour salt. Simmer for 45 minutes and serve hot with a dollop of sour cream or natural yogurt.


Beet Leaf Rolls

INGREDIENTS:
36 large beet leaves, washed and trimmed
1 tsp. salt
Pepper, to taste
1/2 cup fresh dill, minced
1 medium onion, chopped finely
1/3 cup butter (approximate), divided use
1/2 cup 18% cream


Melt 3 Tbsp. of butter in a medium pot over medium-high heat. Add in salt, rice and 2 cups of water - cook rice, covered for 40-45 minutes. Meanwhile, saute the onion in another 3Tbsp. of the butter. Stir softened onion into the cooked rice along with pepper and dill, to form the beet roll filling. Rice the leaves and cut off any tough ribs. Place leaves in a colander and blanche by pouring 1.5 litres of boiling water over them - leaves should be softened but not mushy. Spoon 2-3 teaspoons of filling on each leaf and roll tightly, pushing in each end with fingertips to seal. Butter a small baking dish with 2 tsp. of the butter. Place rolls with seam down in the casserole dish. Pour cream over all. Preheat oven to 300 degrees Fahrenheit, and bake for 30 minutes, loosely covered with foil. Serve warm with or without sour cream or natural yogurt.


NOTE: if the leaves are too small or tattered, or if you are pressed for time, try making a lasagne-style casserole, beginning with a layer of the softened beet leaves and then a thin layer of filling; repeat. End with a leaf layer and pour cream over all. Bake for same amount of time.


Sunday, July 3, 2011

New Summer Classic!

We've been enjoying some sultry summer temps - you hear a few muffled complaints about the heat and humidity, but most of us are pretty careful not to gripe too much... a few weeks and our glorious summer will be on its way out the door and we'll be hunkering down for one of our famous, drawn out prairie winters!

My latest fav summer dessert is so easy you will not believe it - GRILLED PEACHES! I have enjoyed grilled pineapple, but never had tasted grilled peaches until very recently when one of my dearest friends served them at her daughter's post-convocation party. I always feel simplicity is best in life and in food - you want to enjoy the honest flavours of fresh, quality ingredients versus overly-fussy concoctions -- that's just a given:)

Here's how it was done at my friends' BBQ ... hope you will try and enjoy. After sampling the grilled peaches, I am thinking that kabobs with teriyaki-marinated pork or chicken; along with peaches, pineapple, mushrooms and sweet bell peppers would make a killer combo (do you sense a culinary sequel???)!

Gail's Yummy Grilled Peaches

Ingredients

6 large peaches, halved and pitted
2 litre brick of vanilla ice cream
Smucker's caramel sundae sauce (or Starbucks caramel sauce)

Place peaches cut side down on a hot grill for 3-5 minutes, turn and grill the back side for an additional 3-5 minutes - watch carefully, as the finished product should have light grill marks, but should not be charred. Consistency is tender to the fork, but with firmness - not mushy!

Set grilled peaches aside to cool slightly while you slice the brick ice cream into squares. Place one or two peach halves cut side up on the ice cream, drizzle with caramel sauce and serve. YUM! Like pie without the heaviness - just a little piece of heaven for your taste buds xo!

Monday, April 25, 2011

The Yellow Breakfast :)

Last day of the Easter holiday - sun's out and I hope to see some of the outdoor world today -- in relaxation mode, but there are some chores that can't be ignored any longer. Just getting laundry done and the house in order after a busy weekend!

My son ordered another "yellow breakfast" this a.m. - toasted saffron bread, scrambled eggs and his milk in a yellow cup LOL. Love my dude xo xo!

The saffron bread was amazing - purchased for me by my sister at Tall Grass Prairie Bakery (thanks, Sooz). Moist, and with a delicate hint of lemon, the TGPB Easter bread is similar to my Mom's homemade stuff, but it is made without raisins. They also make phenomenal hot cross buns - you can taste the quality and freshness of the ingredients: delicate candied orange peel and spicy goodness :) Like the saffron loaves, the bakery's taste-tempting hot cross buns are moist, light and just melt in your mouth. Just a treat to have either of these toasted with some liquid honey. Sugary buzzzz.....

Some interesting facts about both honey and saffron... did you know that honey is the only food that never spoils? And did you know that saffron comes from a variety of crocus, and has scores of reputed medicinal benefits; but that it is toxic in large amounts? Maybe that's why I crave that little hit of saffron each spring... good medicine; welcome spring!

Along the theme of yellow foods, made family favourites Cheesy Hash Browns and Wife Saver Baked Eggs for yesterday's monster-sized brunch. Here is the recipe for Wife Saver - hope you will try and enjoy - super easy, buttery goodness, comfort food etc...

Wife Saver Baked Eggs

Ingredients:
16 slices whole wheat bread, crusts removed
6 large eggs
salt and pepper to taste
1/2 tsp. dried mustard
1/2 tsp. Tabasco or other hot pepper sauce
1 tsp. Worcestershire sauce
1 cup Cornflakes cereal, crushed
1/4 cup melted butter
1 medium cooking onion, minced
8 process cheese slices (my kids like Velveeta) - any cheese could be used

Method:
Butter a 9" x 12" glass baking dish. Layer 8 of of the bread slices to cover the pan bottom, top with cheese slices and then 8 more of the bread slices. Beat together eggs, seasonings and onion. Pour over the bread layers and cover tightly with plastic wrap - refrigerate overnight or until ready to bake.

One hour before serving time, spread Cornflakes over the top, drizzle with the melted butter and bake at 375 degrees Fahrenheit for approximately 45-50 minutes. Allow to sit 5-7 minutes before cutting into squares and serving. Serves six adults.

NOTE: a layer of thinly sliced ham or par-cooked bacon can be added with the cheese layer, for variety.

Sunday, April 10, 2011

Strawberry Fettucine?

Yes, strawberry fettucine! I received this treat from my girlfriend this week - a product made by one of our clients.

I don't cook a lot of meals during the week - usually some kind of lean protein and veg; with some rice, pasta or bread for the kids (they can burn off all of those carbs!).


But this weekend, it was mostly grey, rainy and cool and I felt like cooking! Thus far, I have made Crackerjack Cookies, cinnamon buns, and tonight I made some strawberry fettucine with vodka sauce, and savoury meatballs with marinara-vermouth sauce. (...and lots of fresh veggies, of course!!!) The pasta was a hit with my kids - my son found the chili after-bite a bit much, but he put a nice dent in his dinner plate, nonetheless :)


Here is the recipe for the vodka sauce - like much Italian cuisine, it is very simple and relies on the quality of the ingredients; I received the recipe at a local fundraiser hosted by De Luca (store and restaurant) and De Luca Fine Wines. I hope you will try and enjoy some evening when you are ready for some comfort food.


Vodka Sauce - For Pasta

Ingredients: 1/4 lb. butter 2 cups heavy cream 1/2 cup vodka 1/4 lb. back bacon (or regular bacon, it is okay) 4 Tbsp. coarsely chopped Italian flatleaf parsley Salt, to your taste Dried crushed chilies, to your taste 1/2 cup grated parmesan cheese 1 lb. pasta of your choice (I used Nature's Farm brand Strawberry Fettucine) Method: Salt a large pot of water and place over high heat to cook your pasta. Meanwhile, melt the butter in a large saucepan over med-high heat. Chop the bacon and add it to the butter, cooking for 5 minutes, stirring occasionally. Add the vodka and cook an additional 1-2 minutes. Add in the cream, salt, half of the parsley, the chilies and the cream. Bring to a boil, stirring regularly. Reduce heat and keep warm until the pasta is cooked and drained. Toss the pasta with the parmesan and half of the vodka sauce. Place pasta on a large serving platter and pour remaining sauce over top, garnishing with the reserved parsley. Absolutely divine - buon appettito!

Monday, April 4, 2011

Going Bananas

The Winter That Will Not End is driving me to BAKE! On Saturday I made cookies AND banana bread - and my kids don't even eat banana bread -- at least they liked the cookies. And I am eating low carb in the hope of fitting my summer clothes, so what the....????

Raining Slush Balls I just wanted the comfort, and a warm oven emitting fabulous baking aromas was the ticket! I am way beyond tired of the damp, cold, bleak and barren landscape - not to mention dirty roads, dirty boots and a dirty car with smudgy windows.


I described going out in the freezing rain feeling like "a million miniature drunks pelting me with margaritas"! In short, NOT fun, and bad hair to boot! If only they really were margaritas, I would've opened my mouth up and waited for the brain stone to hit.


Pam's Bleak Day Banana Bread


Ingredients: 2 cups mashed, ripe bananas (about 4 bananas 1 cup granulated sugar 1/2 cup canola oil 2 large eggs 1 cup semi-sweet chocolate chips 1/2 tsp. salt 2 tsp. vanilla extract 1 tsp. baking powder 1/2 tsp. baking soda 1 - 1/2 cups all purpose flour 2 tsp. butter


Method: Preheat oven to 350 degrees Fahrenheit. Mix together mashed bananas, eggs, oil, salt and vanilla; beating until frothy. Stir in the sugar. Dump in the chocolate chips, flour, soda and baking powder and stir just to combine. Grease a glass loaf pan with the butter, and spoon the batter into the pan. Bake for approximately one hour. If the loaf begins to brown too quickly and the center is still not set, reduce heat to 300 degrees and bake an additional 15-20 minutes -- the variation in time depends on the amount and moistness of the bananas used. Allow loaf to sit for 10 minutes after removing it from the oven; invert the pan to release the loaf. Delicious warm with a bit of butter - diets be damned!


Sunday, March 27, 2011

Coffee Luvr

It's one thing to say you love your coffee, but how many of you can say your coffee loves you back? Check out the grounds in my coffee basket! Actually, this photo was taken at the office back in the fall - there it was - a glistening, coffee-brown heart xo... have not replicated that moment again, but definitely feel the love every a.m. with my hot java :) More recently, on the home front... I had to purchase a new coffee maker and decided to splurge on the Bunn brand coffee maker sold by Tim Horton's. It is a brewer designed for home use, but has some features of the commercial version - in particular the reservoir that preheats the water for your next cuppa! Apparently it is the hotter temp that makes the better brew, and I must say I am enjoying the use of it. It also brews very quickly - a full pot in about two minutes. Satisfies my caffeine addiction, and my impatience too -- LOL! My Mom and Dad were both coffee lovers, but in particular my Mom was the brew master. Ever hospitable, she always makes amazing coffee and usually has some kind of home baking to tempt her visitors too. I am passing on the baking these days (aside from the occasional sugar-free peanut butter cookie) - got to fit my summer duds, after all, and I have been training hard at the gym, so I don't want to blow it. But, I wanted to share a favourite recipe of my Dad's - it is a crumb cake recipe that Dad's sister (my dynamic Auntie Helen!) used to make, and she kindly shared the recipe with my Mom. My Dad passed away in March, twelve years ago, so Dad, this is for you! It is a delicious cake - not too sweet or too rich and it pairs so beautifully with a great cup of coffee. Hope you will try it some time when you want to treat yourself with something home-baked and extra-special. Auntie Helen's Crumb Cake Ingredients: 2 cups all purpose flour 1 cup granulated sugar (brown is also okay) 3/4 cup margarine or shortening 1 tsp. salt 1 tsp. cinnamon Blend the above ingredients with a fork or pastry blender to form a coarse crumb mixture. Reserve 1 cup for topping. To the remainder add: 1 tsp. baking soda 1 tsp. ground cloves 1/2 cup raisins (any type, I like Thompson!) 1/2 cup dried currants (or walnuts) 1 beaten egg 1 cup buttermilk (or 1 cup milk plus 1 Tbsp. white vinegar) Mix well and pour batter into a buttered 8" x 8" or 9" x 12" cake pan (use sometimes use a 10" round springform pan). Sprinkle reserved crumbs over the top and press down slightly with a wooden spoon or spatula. Bake at 350 degree Fahrenheit for 30-45 minutes, depending on pan size. Delicious right out of the oven with... you guessed it... COFFEE xo!

Friday, March 11, 2011

Spudnuts!

Yes... SPUDNUTS!
My Mom makes homemade donuts for Shrove Tuesday (Mardi Gras) - this was a tradition in her home as a child. She uses a recipe that is made with mashed potatoes - so we call them spudnuts - crazy stuff.


Mmm...
This is the first time I have helped Mom with the production of her famous donuts - I was designated "The Glazer". My job was to lightly coat each donut with a glaze made from sugar, milk, vanilla and butter: "Don't drop them in; just use your hands and lightly skim the surface!" (That oil is over 200 degrees Fahrenheit - so, sorry, Mom, I needed to use a fork to manage those little devils --need to preserve my mouse hand!)

Recipe?
Who me, deep-fry? Not likely to happen, so I have never asked Mom for this recipe. The rare time I have something fried, it is in a restaurant - the occasional order of tempura or yam fries. For the donut lovers out there, try searching the web - I saw a recipe on the All Recipes site that contains Mom's secretweapon: NUTMEG! xo!

Sunday, March 6, 2011

March = Meatballs!

Ah, comfort food!
Sundays in March scream out for the stick-to-your-ribs variety of sustenance - it has to be savory and nostalgic to balance the raw cold that just cuts to the bone. So, who am I to fight it? Comfort food it is...

Rolling Right Along...
I was really hoping to get to my studio to paint today, but laundry, errands and a few must-do (but mundane!) tasks around the house have eaten up the best part of the day. I like to paint at midday, when the light is ideal - although it is still daylight until 6 p.m. now, our daylight hours are still short, so it makes the window of opportunity even more precious -- and, at times, elusive!


And so it goes for me all through the winter -- I am on rations of light and starving for more. Unable to paint this aft, and thinking of my own dear Mom and how she always cooked these amazing, balanced, sit-down meals for her family, I decided that I could pour a little love and creativity into my time in the kitchen if not at my easel.

The Decision
After a bit of thought as to what to prepare, I settled on Porcupine Meatballs - not something my Mom made, but a recipe I prepared in my early teens at school, and one that my kids love: Foods and Nutrition class wasn't a total loss, I suppose!

And "NO" - these are NOT made with wild porcupine meat (LOL) in case you are wondering just how wild we Canucks are! These meatballs are made with beef and uncooked rice -- as the rice swells during the cooking process, it sticks out of the meatballs a bit; hence the "porcupine" name!

I have made a few adjustments to the recipe over the years, tailoring the recipe to our tastes; hope you will enjoy the combination of flavours too. We had our Porcupines tonight with a side of homemade Garlic Mashed Potatoes and mixed veg, it was a hit with the fam, and I enjoyed the silence as they all chowed down:) My son had his very LOUD friend over all day and I was quite pleased that Mr. Megaphone Mouth had to go home for din-din...

Satisfying and homey, but not difficult or too labour intensive --
here is the recipe for you to try. Something to warm your heart a little while you wait for signs of spring...

Pam's Porcupine Meatballs

Ingredients:
2 lb. lean ground beef
2/3 cup long great white rice (I use Jasmine or Basmati)
2 tsp. seasoned salt
1/2 cup finely grated cooking onion
1 tsp. Worcestershire sauce
1 large egg
1/2 tsp. freshly milled black pepper
1/2 tsp. chili powder
1/2 cup all purpose flour, for dusting
3 tins of tomato soup
2 tsp. brown sugar
2 cups water
1-2 Tbsp. canola or olive oil for browning

METHOD:
Combine beef, egg, rice, onion, Worcestershire, salt, and pepper in a large bowl and mix thoroughly until evenly combined. Pre-heat a deep skillet with a tight-fitting lid, adding in the oil.

Place the flour in a small bowl and begin rolling the meat by tablespoonfuls. Dust each ball lightly in the flour, patting off the excess and then placing the meatballs in the skillet to brown.

When all meatballs are browned, add in the soup, water, brown sugar, and chili powder, and stir gently to combine ingredients and coat all of the meatballs. Cover and simmer for 45 minutes to one hour - until rice is tender and sauce thickens slightly. Serve with mashed potatoes and veg. Makes about 3 dozen large meatballs.

Garlic Mashed Potatoes

Ingredients:
3 lb. russet potatoes
1- 1/2 tsp. salt
1/4 cup butter
1/4 cup milk
5 cloves garlic

METHOD:
Cut the tips and ends off each garlic clove, but do not peel completely. Wrap in foil and place in an oven at 300 degrees Fahrenheit for 1- 1/2 hours. Remove from oven and set aside.

Peel and chop all potatoes, covering with water in a large pot, and adding the salt. Bring to a boil and cook for 15-20 minutes, until tender. Drain the potatoes, add the butter, milk and roasted garlic -- the garlic will easily slip our of the skins and will be just like soft cheese. Mash well until creamy in consistency - serve.

Tuesday, February 8, 2011

Moonbeams, Zombies, Chocolate


Man! I don't know about your town/city/village/space station but in Winnipeg, Canada the winter blues have hit a new level of freakishness - I did a little people watching while I was stopped in traffic this afternoon and I swear they looked like Dawn of the Dead extras; SERIOUSLY! My girlfriend asked me, "Is the moon full?" like she was reading my mind ((which she seems to have an uncanny ability to do, btw!)) - sadly, no, the moon is waning and it's just this wimpy yellow finger nail clipping; no magical power to transform regular peeps into monsters. So the full moon/wild thang factor can't explain the local weirdo surge...

Savings, Schmavings!
I wasn't planning on taking any vacation time until the summer months, but man the travel bargains are beckoning, given my situation. Our flat-as-a-pancake city has been transformed by grubby mountains of ice, snow and road salt, piled 6-8 feet high along the streets, creating strange marble runs for the zombie drivers to blitz carelessly through ((hey, they're zombies, can't kill what's already dead!)). This dreary, eerie ((did I mention, frickin' freezin'?)) environment, combined with the gloom-and-doomer predictions that the world will end in 2012 ((Mayan Calendar hype)) has this Momma thinking, "Savings schmavings... I want outta here; let's go for broke with a side dish of sun and sand!"

Recipe for Escape
Even my usual food therapy tactics seem unappealing, particularly since the near-catastrophic, painfully recent Paula Dean Arnold Palmer cupcake baking session! One promising culinary diversion is the collection of gourmet pastas I received recently from work: exotic pumpkin spice, chipotle pepper and cocoa chili linguine are waiting in the cupboard for their moment in the kitchen limelight - oh thank heaven!

I have been scouring my recipe books and online sources inspiration -- looking for sauces to pair with these fantastically flavoured pastas. I want to enjoy the cocoa chili linguine with something savory; for a main course - don't want to serve those chocolaty noodles as a dessert with fruit and whipped cream ((ugh!)). So I am thinking of a variation on a Mole ((not the critter, the burrowing mole - mole-ay, as in latin-american savory goodness)). I am thinking the mole, freshened up with some zucchini and bell peppers and maybe a bit of mango, would be just the ticket to alleviate my current state. Suggestions? C'mon - I am surrounded by zombies in a desolate deep-freeze called Canada. Won't/can't you please throw me a life line?

Have it your way...here is my recipe for Coco-Mole Linguine. For the cocoa chili pasta, try ordering online from Nature's Farm:


Cocoa-Mole Linguine

Mole Ingredients:
1 tsp. toasted cumin seeds, cooled
1 tsp. crushed, dried oregano
1/8 - 1/4 tsp. ground cinnamon
Dried, crushed chilies to taste, or chipotle paste
2 medium onions, chopped
2 Tbsp. olive oil
1-2 cloves minced garlic
3 medium zucchini cut into bite-size chunks
1 bunch kale, coarsely chopped
1 red or orange bell pepper, chopped
1 tsp. orange zest
1/4 tsp. sugar
Sea salt, to taste (approx. 1 tsp).
1 ounce unsweetened chocolate, finely chopped
1-14.5 ounce tin of diced plum tomatoes
1-1/4 cups water
1-15 ounce tin of rinsed pinto beans

Garnish:
1 ripe mango, finely chopped
1/8 tsp. dutch cocoa powder
Sour cream

Pasta:
Nature's Farm Cocoa Chili Linguine; or your favourite chocolate pasta.

METHOD:
Pulse toasted cumin seeds and chilies (or just cumin seeds, if using chipolte paste) in a coffee mill or small processor until finely ground. Mix together with cinnamon, oregano, salt and sugar in a small bowl.

Measure the olive oil into a heavy skillet and saute the onions until tender over medium-high heat. Reduce the heat slightly and add in the minced garlic, cooking until tender and taking care not to scorch it. Stir in the spice mixture, stirring constantly for 1 -2 minutes. Quickly add in the zucchini, kale and bell peppers; cover and cook for 5 minutes.

Add in the tomatoes, zest, chocolate pieces, beans and water and bring mixture to a simmer - cover and stir occasionally, cooking an additional 15-20 minutes.

Meanwhile, cook your pasta to al dente. Serve the pasta topped with the mole and garnished with fresh mango, a small dollop of sour cream and a light sprinkle of cocoa. Enjoy xo!