Monday, September 29, 2014

Oaty-Carrot Cookies

By Pam HadderThis recent vegan cookie experiment was a home-run with my young son (my resident cookie expert), so I am making sure I share this with you while all my proportions and ingredients are fresh in my mind!

After trolling the Internet to find a good new oatmeal cookie indulgence, this resulted.  Many of the recipes that looked interesting were not vegan, and many of the vegan ones had tired/bland flavour profiles.  The addition of carrot adds a muffiny moistness to this recipe - and the cinnamon glaze (optional) contributes a cinnamon bun-like hit of sweetness (as if you aren't sweet enough, awww.....).  Happy baking - hope you will enjoy these in good health xox.


Pam’s Oaty-Carrot Cookies

Ingredients for cookie dough:
1 cup quick oats
1-3/4 cups all purpose flour
½ cup sugar
¾ cup brown sugar
1/8 tsp. sea salt
2 tsp. cinnamon
½ tsp. ground cloves
1 cup dried cranberries (or other fav dried fruit)
¾ cup chopped walnuts
½ cup toasted, flaked coconut* (crushed) – you could use any coconut here!
1 tsp. baking soda
½ tsp. baking powder
Egg replacer for two large eggs**
3 tsp. vanilla extract
1 cup coconut oil, melted and cooled (should be warm but not super hot!)
2 cups finely grated carrot (I use my steel zester for this – really fast and nice, fine gratings)


Ingredients for cookie glaze:
1 cup icing sugar
1 tsp cinnamon
2-3 Tbsp. of hot water

(**I purchase the toasted coconut flakes at Costco – very intense toasty flavor!  You could also toast your own - just place the coconut in a nonstick pan over med-low heat; stir constantly until browned – you need to stir or it won’t toast evenly and bits will burn.)
(*I used Red Mills Egg Replacer, but 2/3 applesauce or one medium-sized mashed banana would also work for this recipe.)

Method:
Preheat your oven to 350 degrees Fahrenheit and line three baking sheets with parchment paper or wax paper. Combine all dry ingredients in a large bowl: flour, sugars, salt, baking soda and baking powder, spices, coconut and cranberries.  In a medium-size bowl, combine your egg replacer (for two eggs – or use one banana; or 2/3 cup unsweetened apple sauce), cooled coconut oil and vanilla extra – stir to combine.  Add the grated carrot to the wet ingredients, stirring once more. Pour wet ingredients into dry and stir just to combine – this forms a firm yet moist cookie dough.   Scoop out rounded tablespoons of dough and place the mounds on the prepared baking sheets, about 2” apart.  Try to make the mounds a consistent size so that you have evenly baked cookies in the end!  Bake on the centre rack of your oven for 15 minutes – depending on the moistness of your carrots, you may need to adjust the time plus or minus 3-5 minutes.  I recommend checking them around minute 12, and I always bake a “test cookie” – my son is the happy tester/baking expert!  If it passes his scrutiny, it’s a winner, lol! 

To make the glaze, stir the cinnamon into the icing sugar and gradually add the hot water to form a thick syrup consistency -drizzle this over the cookies while warm.

This recipe yielded 3.5 dozen cookies for me, but it will depend on the size of your scooping!  Enjoy xoxo

Tuesday, September 2, 2014

Summer Harvest Soup

By Pam Hadder

I love soup - no matter the season, to me, no meal says comfort quite like soup!  Soups are typically quite fast and economical to make - it's great to improvise with what you have on hand, or to suit what is available in the garden or your local market.  Tonight I was craving something savoury, but was feeling exhausted.  However, I am glad I dragged my butt into the kitchen, because in less than an hour, this soup recipe was ready and I had a very happy tum :) Good soup just sets your heart right, you know what I mean?

This vegan acorn squash soup makes use of some of the early summer harvest: local carrots, celery, onions and baby potatoes along with a less typical blend of seasoning.  There are also some options provided to help you create your own signature version - very easy to add or sub other fresh veg based on what you have available. I enjoyed my serving with rye toast and sliced tomatoes on the side - hope you will try and enjoy xox

Ingredients:
1 medium-size acorn squash

2 Tbsp. coconut oil
1 medium cooking onion, finely chopped
3 medium carrots, peeled and thinly sliced
2 ribs celery (or four leafy ribs from the heart), chopped thinly
12 baby potatoes, washed and chopped in 1/2" pieces

2 cloves fresh garlic, finely minced or pressed
3-4 cups vegetable stock (or water, but stock is preferred)
2 rounded Tbsp. whole grain mild mustard (I like Maille brand, L'Ancienne Old Style Mustard)
1 tsp. dried basil
1/2 tsp. sea salt

1/2 tsp. dried crushed red chilies
Fresh ground black pepper to taste (I use about 1/2 tsp.)

1 can of coconut milk (approx. 1.5 cups)

Method:
Wash the acorn squash and cut it in half, scooping out the seeds and stringy pulp.  Place the halves cut-side down on a large plate, adding a couple of tablespoons of water and covering tightly with microwave-safe wrap.  Microwave for 15-17 minutes - a sharp knife should easily pierce through the skin when the squash is ready.  Cooking time may vary depending on your microwave and the size of your squash.  While the squash is cooking, melt the coconut oil over medium heat in a large covered saucepan.  Add the onion, carrots, celery and baby potatoes; stirring intermittently, cook for about 10 minutes (onion should be clear and vegetables should be par-cooked but not mushy. Add in the garlic and cook 3-4 minutes longer, stirring as needed.  Stir in the salt, pepper, chilies, basil, mustard and vegetable stock, bring to a simmer and reduce heat if mixture begins to boil. Continue to simmer until the squash is ready.  When the squash is cooked, scoop out all of the flesh into a medium bowl and mash it coarsely with a fork or potato masher. Add all of the squash to the soup mixture, and stir in the coconut milk.  Continue to simmer for 5 minutes - serve and enjoy.


Options:
I like a rustic, chunky texture to my soup, but if you prefer a velvety texture, this soup can be blended using a counter-top blender or immersion blender. Alternatively, you can scoop out half of the soup, blend it and add it back to the chunky veg in the saucepan (compromise between puréed and chunky, lol!) Some great add-ins or substitutions for the veg ingredients would be finely chopped broccoli or cauliflower (about one cup); or fresh corn off the cob (peaches and cream, mmm - just use a small knife and scrape those kernels into the pot!). Add these optional veggies with the onion, celery etc. when you sauté. Also, depending on how long the soup simmers and your personal preference for consistency, you may wish to add a bit more broth.  

Monday, February 17, 2014

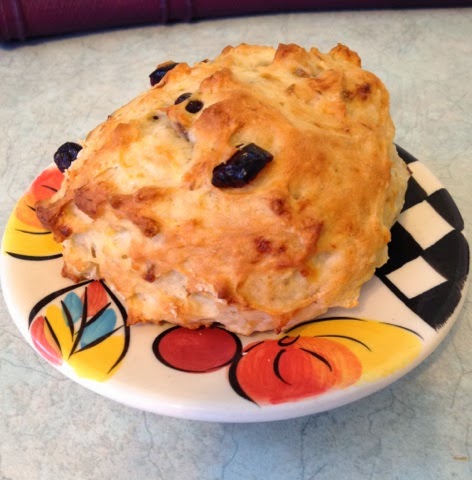
Cran Banana Biscuits

By Pam Hadder

I have had this tea and biscuits theme running through my brain - must be the winter doldrums!  So this morning I decided to make some tea biscuits. I found a very simple recipe with flour, oil, bananas and soy milk - it seemed interesting, but with 4-1/2 cups of flour and no salt, no fruit etc, these seemed pretty heavy and Spartan - survival food! So my
Cran Banana Biscuits were born - I rev'd up the flavour, increased the fat and reduced the flour to a modest three cups et voilà... the BEST part, these don't have to be kneaded or rolled out/cut; just drop from a spoon and bake.  Hope you will try and enjoy with your favourite hot cuppa xox


Pam's Cran Banana Biscuits

Ingredients:
3 ripe bananas, mashed well
1 cup dried cranberries
1 cup soy milk
2 tsp. apple cider vinegar
1/4 cup canola oil
zest of one orange (or lemon)
1/2 tsp. salt
2 Tbsp. sugar
3 cups flour
1 Tbsp. baking powder


Method:
Preheat your oven to 425 degrees Fahrenheit and line two baking sheets with parchment paper (or lightly oil with vegetable shortening). Place the soy milk in a small bowl and stir in the apple cider vinegar - set aside; this will curdle and thicken slightly.  Place the mashed bananas in a large bowl and stir in the cranberries, oil and zest.  In a medium bowl, combine the flour, sugar, baking powder and salt.  Add the milk mixture to the bananas and beat well until creamy.  Dump all of the dry ingredients into the wet mixture and stir just enough to combine - don't want to beat it, but you don't want floury bits either ;)  Using two tablespoons, scoop about 1/3 cup of the batter at a time onto the prepared baking sheets, allowing about 2" between each biscuit.  The batter will be moist, but it holds its shape in soft mounds.  Bake for 20 minutes - biscuits will be golden brown on top and moist/flaky inside.  Enjoy with vegan butter and fruit, or your favourite fruit preserves - I love my homemade, vegan strawberry freezer jam (sugar free and yummy!). xox


Sunday, February 16, 2014

Cheesy Vegan Fondue!

By Pam Hadder

For a lot of potential vegans, the hardest thing to imagine is life without cheese!  For me, it was butter, but then I discovered the marvels of coconut oil and other veganlicious delights. Nonetheless, when I received a vegan cookbook for Christmas and discovered a cheese fondue recipe in it, I was so excited - what could be nicer on a winter weekend than a leisurely, luxurious, cheese fondue accompanied by a crisp green salad and some excellent wines? So I had to try that recipe straight away!  The first thing that struck my attention was that the recipe did not include any vegan cheese - what the...???  How was this going to work? But I stuck with it, and a baguette and bottle of wine later...well, it was an amazing feed and I would never of known it was vegan.  I have made some adjustments to the excellent recipe, however - reduced the salt and completely replaced the water with wine (duh - that's a given!).  This fondue is easy to make and will serve 6 for a hearty appetizer or snack; if you combine with a big salad, you have a wonderful meal for four. Whether you are vegan or just looking for healthier alternatives from time to time, I hope you will indulge in this amazing fondue experience xo!

Pam's Cheesy Vegan Fondue

Ingredients:
1 clove fresh garlic, cut in half
1-1/2 cups white wine (something sweet and fruity - but not too sweet)
4 Tbsp. coconut oil, melted

1 tsp. sea salt
1 tsp. Marmite (or miso paste)
2 Tbsp. apple cider vinegar
1/4 cup nutritional yeast flakes
1/8 tsp turmeric (for colour)
1 cup raw cashews
3 Tbsp. cornstarch
1/2 tsp. granulated garlic
1 tsp. onion powder

Method:
Prepare the fondue pot by rubbing the inside thoroughly with the cut garlic halves- discard the left-over garlic pieces
. Place 1/2 cup of the wine to the side, and put all remaining ingredients into a blender, buzzing until creamy smooth (about 3 minutes). Heat the fondue pot to low, add the reserved 1/2 cup of wine to heat through. Pour in the blender mixture and continue to heat on low, whisking gently to avoid clumping/burning. The fondue will thicken in about 7-10 minutes. Dim the lights, cue the dreamy music and start dunking that bread!  Delicious!

Note: fondue can be prepared ahead on stove-top and reheated - will keep in the refrigerator for 3-4 days. xo


Monday, January 13, 2014

Cleopatra's Sweets

by Pam Hadder
Right now my son is doing a school project on Egypt, and each member of his group is contributing by making something as it would have been done back in the time of the Pharaohs - well, they are each approximating that task, and kudos to them!  My little guy came across a sweets recipe that is an authentic take on honey-poached fruit and nut balls that were a favourite of Cleopatra. Packed with nutrition and served with whatever fresh fruit was in season (pomegranates are suggested) these little morsels are easy to make! Not only have they have inspired his imagination, we had fun making them together and talking about how the ones made thousands of years ago would have been different - the coarseness of the hand-ground flours, and so on. We enjoyed sampling them too, so I thought I would share the recipe with you - they are even vegan-friendly.  Well, let me rephrase that, because some vegans don't eat honey - I am guessing you could substitute corn syrup, if that is the case with you :)  I am one of the vegans that eats a small amount of honey - it is a nutritional powerhouse, and my great-grandfather kept bees, so I suppose it's in my genes.  Did you know that honey is the only food that does not expire? Maybe Cleopatra thought it would keep her young and lovely from the inside out?  She was known for her beauty and her wisdom, that's for certain! 

Cleopatra's Sweets

Ingredients:
1 cup whole wheat flour
1/2 cup cold water
1/2 cup chopped dates
1/2 cup chopped walnuts
About 1-1/2 cups organic, unpasteurized golden honey
Fresh fruit in season - we used pomegranates

Method:
Chop the nuts and dates and place in a medium-sized bowl with the flour, stirring to combine well. Gradually stir in the water, mixing to form a firm but moist dough ball - you may have to add a slight bit more water or flour to get it just right.  Cover the dough and set aside for 10 minutes. Using two spoons or lightly moistened hands, shape the dough into walnut-sized balls - don't roll, just gently pat into a round-ish shape, placing them on wax paper that has been lightly oiled or sprayed with Pam spray. Put the liquid honey in a small sauce pan and turn to medium-high - it will come to a frothy boil.  Reduce the heat slightly and place the dough balls into the honey to poach, turning them gently with two spoons - they need to cook for 8-10 minutes. Poach about 6-8 balls at a time - this recipe will make about 14-16 balls. When the balls are cooked, remove from the honey and set on a plate to serve. Garnish with fresh fruit and enjoy!  Oh, and save any leftover honey to sweeten other dishes - it gets darker and thicker, but is still usable.

I understand the Egyptians loved their homemade beer, but these would be lovely with coffee or tea. Next time we make them, I might add a dash of cardamom or cinnamon to the honey - not sure how authentic that is, but I think it would be a nice variation. 

Hope you will try and enjoy xox

Saturday, November 2, 2013

Lemony Tea Cookies

By Pam Hadder

'Tis the season!  Before we know it there will be snow and ice and carols playing everywhere we go. Thus, while I have a few free moments, I am looking over a few good recipes for holiday baking and what I have found is that most of my "family favourites" can be easily adapted to fit the vegan diet.
This recipe for vegan Lemony Tea Cookies was created from a basic sugar cookie recipe I found online a couple of years ago.  These cookies are buttery (without real butter, naturally!) and so satisfying, AND the lemon is a refreshing change from the over-abundance of heavy, chocolate, caramel and mint flavours we typically see during the holiday season. These cookies are easy to adapt to suit your favourite tastes or what you have on hand - for example, chopped pecans and orange zest could be substituted for the lemon, or why not make them with lime zest and lime juice?  Happy baking - hope you enjoy these in good health xox  


Lemony Tea Cookies - Vegan

Ingredients:
1-1/2 cups powdered sugar

1/8 tsp. salt
1 cup coconut oil, softened* (not melted - coconut oil is solid at room temp)
1/4 cup soy milk
1-1/2 tsp. lemon extract
zest of one lemon
1-1/2 cups all-purpose flour
2 Tbsp. corn starch
1 tsp. baking soda
1 tsp. cream of tartar
*vegan margarine could also be used - personally I love the buttery flavour of coconut oil, but both work just great.  I recommend Earth Balance.

Method:
Wash and zest your lemon - if you don't have a zester, a fine steel grater will do. In a large bowl, combine the coconut oil, lemon extract, salt, and lemon zest.  Gradually stir in the powdered sugar and soy milk, beating until light and fluffy (I mix this dough by hand, but you could use a hand mixer also).
Combine the flour, corn starch, soda and cream of tar tar in a small bowl.  Gradually mix these dry ingredients into the creamy coconut oil mixture to form your cookie dough. This dough is quite dry, but depending on your flour and coconut oil, you may need to add up to an additional cup of flour - the finished dough will be similar to pie pastry.  Wrap the dough tightly in plastic wrap and chill in for 30 minutes.  

When ready to bake - preheat your oven to 350 degrees Fahrenheit and begin rolling out the cookie dough (about 1/4" thickness, but experiment with different cutters and thicknesses of dough - a slighter thicker dough yields a chewy, softer cookie, and slightly thinner will make a crispier cookie; both are yummy!).

Place the cookies about 2" apart on a parchment lined cookie sheet and bake for 7-10 minutes - a lighter coloured cookie will be soft/chewy, and a lightly golden cookie will be crispier.  Allow to cool fully before icing.  My Lemony Tea Cookie glaze recipe follows, below.


Lemony Tea Cookie Glaze 

2 cups powdered sugar (icing sugar)
1 tsp. lemon extract
Juice of one lemon
Zest of one lemon
Hot water, as needed

Candy sprinkles or dusting sugar
(optional)


Method:
Zest and juice one lemon. Place the zest and juice in a medium sized mixing bowl along with one teaspoon of lemon extract.  Gradually beat in 2 cups of icing sugar - the consistency should be fluid/creamy but not runny. If the mixture is too thick, or if it thickens while you are working, just add a teaspoon or two of very hot tap water to restore the creaminess. Ice the cookies and sprinkle with dusting sugar or sprinkles - I use Hagel Zucker (German bakers' decorative sugar) because it reminds me of winter snow!). Allow the glaze to dry - it will be shiny in appearance and smooth to the touch.  Store in containers with tight fitting lids, placing wax paper between the layers.  If you are making these in advance, I recommend baking the cookies and freezing them WITHOUT frosting. Then make the glaze and frost them a week or so in advance of serving - these taste even better when the natural lemon oils have had time to permeate.


Sunday, October 6, 2013

Those Little Donuts...

By Pam Hadder

Maybe it's the fall air, but lately I feel the need for a little cinnamon and sugar goodness with my coffee.  Enter the mini donut baker - I stumbled upon this gizmo when running errands for the office and the rest is history :)

Similar to a waffle iron and about the same cost (about $20), the donut baker makes it easy to whip up a batch of vegan mini donuts to satisfy said cravings - with a whole lot less fat and calories.

Sadly, the baker I purchased had only the most basic instructions for use and cleaning and did not include any recipes. So, phase II, I scoured the Internet and vegan recipes apps for some good baked donut batters and ended up adapting a basic donut recipe from the PETA web site to make my cinnamony minis. Here is the recipe - hope you will try and enjoy with a hot cuppa and a friend or two (always better when shared).  

Ingredients:
2 cups all purpose flour
1 cup granulated sugar*
3 tsp. baking powder
1/2 tsp. salt
1 tsp. ground nutmeg
2 tsp. ground cinnamon**
1 cup soy milk
2 tsp. apple cider vinegar
2 tsp. vanilla extract
1 small banana mashed, or 2/3 cup unsweetened apple sauce
1/2 cup canola oil
*Plus an additional cup of sugar for dusting
**Plus an additional 2 Tbsp. of cinnamon for dusting
One clean paper lunch bag


Method:
Combine the soy milk and vinegar - set aside.  The vinegar will make the milk curdle and thicken somewhat. Meanwhile, combine the dry ingredients: flour, sugar, baking powder, salt, and spices.  Add the curdled milk to the oil, vanilla and banana/apple sauce, stirring well to combine. Stir the wet ingredients into the dry to form a smooth batter. Plug in the donut baker and spray it lightly with Pam spray - allow it to heat up in the closed position, then open and wipe away any excess Pam spray. While the baker is heating, combine the extras sugar and cinnamon for dusting the baked donuts - just place the sugar and cinnamon in the small brown lunch bag and shake to combine.

Once your baker is hot and you have wiped away any excess Pam, place a rounded tablespoon of batter in each of the donut recesses.  Close the baker, set your kitchen timer for 2 minutes and 20 seconds - flip the baker and set the timer for another 2 minutes and 20 seconds.  Remove the donuts carefully - I use chopsticks, they work so terrifically and it's fun! Place the hot donuts in the dusting bag and shake to coat.

I have found some other great recipes for baked donuts, including toasted coconut, chocolate and pumpkin/maple glaze.  Will post the recipes as time allows.

Please note, that if you don't have a donut baker, you can also buy donut baking pans - both standard size and mini.  However, the mini donut baker is just great uses a lot less energy than a standard oven.  I purchased my baker at the Real Canadian Superstore and it is President's Choice brand.

Enjoy xox,

Pami