Tuesday, January 23, 2018

Vegan Spicy-Citrus Tomato Soup

By Pam Hadder

Yes, I'm a little crazy for soup. I engaged in a little kitchen alchemy yesterday, using the veg I had on hand and getting a bit creative with seasoning and my Vegan Spicy-Citrus Tomato Soup was the outcome!

Everyone loved it, so I'm posting this recipe while the magic is fresh in my noggin! Don't be afraid of the citrus in this soup - yes, it contains orange, but it is not an overwhelming flavour.  Rather, it adds a lovely brightness to the soup and pairs nicely with the chilies, marjoram and tomato. Happy soup making - in my view, nothing beats a steaming pot of soup for dinner on a winter day xox

Pam's Vegan Spicy-Citrus Tomato Soup

INGREDIENTS:

1/4 cup olive oil
2 medium onions, finely chopped

Sea salt to taste (I used 1 tsp.)
2 cups carrots, peeled and sliced
1.5 cups chopped celery (I use the pale inner stalks for soup, including leafy bits)
3 clove fresh garlic, crushed
500 g. sliced fresh mushrooms
2 tsp. dried and crushed marjoram
1 tsp. dried and crushed parsley
1 tsp. cracked black pepper
1/2 tsp. dried crushed red chilies
1 large tin mixed beans (540 ml), drained and rinsed
1.5 - 2 cups crushed, strained stewed tomatoes (tinned)
4 -5 cups water plus 1 vegetable bouillon cube (or 4-5 cups veg stock)
1/2 large orange, seeded and cut in quarters, rind on

METHOD:
Heat the olive oil in a large soup pot for 2 minutes over medium heat, adding in the onion and salt.  Stirring occasionally, cover loosely and let the onions cook for 5-7 minutes, until beginning to turn translucent. Add in the carrots, celery and garlic, stirring to combine and covering loosely. Continue to cook for 10-12 minutes, then add in the mushrooms, marjoram, parsley, black pepper, chilies and one cup of the water - stir, loosely cover and simmer another 7-9 minutes.  Add in the beans, tomatoes, water, bouillon, and orange pieces. Reduce heat and simmer for 30-40 minutes. Scoop out the oranges pieces and discard, then serve with pasta and a bit of grated veggie cheese, or as-is with some fresh bread and veggie "butter." Serves 4-5.


Monday, January 22, 2018

Winter Sunshine - Vegan Chickpea Stew

By Pam Hadder

Recently I had a fairly severe allergic reaction to a new "hypoallergenic" face cream. It has been several years since I've had this type of reaction, so it really caught me off guard.  My eyes almost swelled shut - so, not fun and a bit frightening. Aside from antihistamines, fresh cucumber masques and cool cloths, I tried to use nutritional supports to reduce inflammation and sensitivity. My Winter Sunshine - Vegan Chickpea Stew
resulted.

It is a vegan recipe, but you could easily adapt it to suit your food preferences - adding additional protein, for example, leftover chicken. However, it may surprise the carnivores and omnivores among us just how satisfying an all veg stew can be. I enjoyed this with a slice of fresh bread and veggie "butter" and it felt like a warm hug - not a good sick person, lol.  The magic ingredient is turmeric, known for its healing properties.  If you haven't cooked with turmeric, it is a yellow powdered spice common in Asian cooking that comes from the turmeric plant, and it is what gives curry powder blends their sunny yellow colour. The medicinal component of turmeric is called curcumin.  Some health sites note that fat and black pepper help our bodies to absorb the beneficial curcumin, so if you are adding a bit of turmeric to rice when cooking it, also add a bit of oil (I suggest olive or, my go-to, coconut oil), and serve it with fresh cracked black pepper.  Yummy and very healing for the body.  Also, turmeric needs heat to blend with foods, so you wouldn't add the dry powder to a cold salad dressing, but you could make a cooked vinaigrette that is served warm, or cooked to dissolve/blend then cooled to serve (and remember... fat, black pepper are your turmeric buddies!). 

I hope you will enjoy making and eating this soup recipe in good health - even if you don't have an allergic reaction, cold or other health ailment, turmeric is a wonderful additive, if only for it's subtle bitter flavour and sunny colour. This recipe is easily doubled or tripled for larger groups, or to make-ahead for easy meals - freezes very well. xo

Winter Sunshine - Vegan Chickpea Stew

INGREDIENTS:
2 Tbsp. olive oil (or coconut, canola, sunflower oil)

2 medium cooking onions,  chopped
1.5 tsp. fresh cracked black pepper
Sea salt to taste (depends on seasoning of your broth)

2 tsp. dry, crushed savory or sage
2 tsp. turmeric powder
4-6 cups vegetable soup stock
3-4 cloves fresh garlic, minced/crushed
4 large or 6 medium potatoes, peeled and cubed

1.5 cups peeled and chopped carrots
1.5 cups chopped fresh celery (I save the paler inside stalks and greens and use them for soup)
1 large can chickpeas, drained and rinsed
1/2 lemon, seeded and quartered
1.5 cups chopped fresh parsley

METHOD:
Heat the oil for 1-2 minutes in a large soup pot over medium heat. Add in the onions, sea salt and black pepper, stirring frequently. Once the onions begin to soften, cover and reduce heat and cook for another 5 minutes. Add in the garlic, celery, carrots, potatoes, turmeric, savory/sage, and four cups of broth. Add enough additional broth or water to cover all vegetables. Increase heat and bring to a gentle boil, then reduce heat and simmer for 30 minutes.  Add in the chick peas, squeeze the juice from the lemon pieces into the pot and throw the lemon pieces, rind and all into the pot. Cover and simmer 15 minutes. Add in the parsley, stirring to combine - simmer an additional 15 minutes, scoop out the lemon pieces and discard, and serve. 

Other great add-ins: homemade dumplings, grated veggie cheese, or a dollop of yogurt.  I think some stewed diced tomatoes and zucchini would be great in this soup - also frozen peas or corn.  Have fun personalizing your delicious pot of soup :)

Note: If you like a thicker or thinner stew, adjust by adding a bit of water or additional stock - adjust seasonings accordingly, to your taste. 

Monday, January 8, 2018

African Peanut Stew


By Pam Hadder

I love African peanut soup and stew and have been trying various recipes for over 20 years! Typically, I don't experiment too much with the recipes, because they aren't from my cultural origin, but I wasn't quite getting the flavours that pleased me. 

This recipe was made out of my head, inspired by many years of trying peanut stew and peanut soup recipes, and is a vegan version. If you eat meat, you could easily add chopped cooked chicken and could use chicken broth instead of the vegetable broth.  Other additions could to boost protein are tofu and chick peas - tofu can be cubed, seasoned and pan fried first and added at serving time; chick peas can also be seasoned and lightly oiled, then pan fried or baked to add to the stew. Nice garnishes are fresh chopped cilantro, parsley, peanuts, cherry tomatoes or greek yogurt (any or all of these items pair really nicely) - be creative with what you have on hand and what you enjoy eating.  I love this soup "as is" with a scoop of steaming rice, but it is also fun to have a few options on hand allowing your family and friends to customize their bowl!

I hope you will will feel free to put your own stamp upon this recipe, based upon your flavour preferences and dietary needs. Enjoy in good health xox

Pam's African Peanut Stew

Ingredients:
1/4 cup olive oil
1 large cooking onion, finely chopped
4 cups vegetable broth
2-4 cups water, depending on desired consistency
1 - 540 ml size tin diced tomatoes

2 sweet potatoes (approx. 750 g), peeled and cubed
1 - 1/2 cups carrots, peeled and sliced
3 cloves crushed garlic
1 tsp. cracked black pepper
1 tsp. crushed red chilies
1 tsp. ground cumin
1 tsp. ground cinnamon
1/2 tsp. sea salt
1-1/2 tsp. dry ground ginger
3 Tbsp. freshly grated ginger
6-8 star anise pods
2/3 cups chunky peanut butter
4-6 cups fresh spinach, roughly chopped
*Optional: 1/2 lemon, juice and rind

Method:
Heat oil in a soup pot over medium heat, and stir in the onions, sea salt and black pepper.  Stirring frequently, loosely cover and cook onions 5-7 minutes until they begin to turn translucent. Add in the carrots and garlic, reducing heat, and loosely covering - cook an additional 10-12 minutes, adding a bit of water or vegetable stock if the vegetables begin to brown.  You want the veggies to soften, but not caramelize - you may need to reduce the heat.   After cooking the carrots with the onions for 10-12 minutes, add in the tomatoes, sweet potatoes, vegetable stock, all seasonings and spices - reserve the star anise, peanut butter and spinach.  Add enough water so that all vegetables are covered.  Increase heat to bring to a boil, then reduce to a simmer and loosely cover - allow to simmer 45 minutes.  When there is 15 minutes left on the 45 minute timer, I start my basmati rice (recipes follows).  Add in the peanut butter and star anise pods, along with all of the spinach. Optional - squeeze in juice of 1/2 lemon, and removing, seeds, cut squeezed rind in quarters and add it to the broth.  Stir well and simmer an additional 15-20 minutes. Remove the star anise pods and lemon rind, if used, serve in bowls over a scoop of hot basmati rice.

Method/Recipe - Basmati Rice:
1 - 1/2 cups dry measure rice
3 cups cold water
1/2 tsp. sea salt
2 Tbsp. coconut oil

Heat the oil in a medium saucepan with a tight fitting lid. Add in the dry measure of rice and the salt. Cook, stirring frequently for 3-5 minutes. Add in the water, increasing heat to bring to a boil. When the rice boils vigorously, reduce the heat to low, tightly cover and set a timer for 15 minutes. At 15 minutes, turn off stove element, uncover and stir the rice, recover and let stand 3-5 minutes. Serve as desired.


Sunday, October 22, 2017

Vegan Spice! Amazing Pumpkin Cookies


By Pam Hadder
I love everything pumpkin and pumpkin spice – who doesn’t!  These were heartily approved by my son – my resident cookie monster, and trusted taste tester – and  I am pleased to report that these easy, vegan cookies were a recent hit with his friends also.  I hope you will bake up a batch and enjoy them in good health xo!

INGREDIENTS:
 For the Cookies -
2.5 cups all-purpose flour (or sub ½ cup of flour with quick oats)
1 teaspoon baking soda
1 teaspoon baking powder
2 teaspoons ground cinnamon
2 teaspoons ground ginger
1 teaspoon ground nutmeg
1 teaspoon ground cloves (I grind my own – way more flavour!)
½ teaspoon sea salt
1 cup granulated white sugar
½ cup brown sugar
½ cup vegan soft margarine (I use Becel – can sub ½ cup applesauce, canola oil or coconut oil)
2 cups cooked, pureed pumpkin
2 teaspoons vanilla extract
*Optional - 1 cup chopped mixed, dried fruit (I found a mix with apricots, raisins, dates and cherries) Could also use chopped nuts, coconut or chocolate chips – variations are endless!

For the Glaze -
1.5 cups powdered sugar
Vanilla extract, to taste
Cinnamon to taste
Hot water – approximately 1/3 cup

METHOD:
Preheat oven to 350 degrees and prepare two baking sheets with parchment paper. Lightly spray the parchment with Pam spray. Mix together flour/oats, spices, salt, baking powder and baking soda in a medium bowl.  Stir in chopped fruit and set aside.

In a large bowl, beat together margarine, both, sugars and the vanilla; stir in the pureed pumpkin.  Gradually stir in the flour mixture. Drop by spoonfuls onto the prepared baking sheets. Bake 15-18 minutes until firm.  Cookies have a cake-like texture, similar to old fashioned hermit cookies.  Let cool completely before glazing.  To make glaze, measure icing sugar into a medium bowl.  Add in vanilla and cinnamon to taste – I used 1 teaspoon of each.  Stirring, slowly add enough hot water to make a soft icing. Using a butter knife or teaspoon, drizzle over baked, cooled cookies. Allow glaze to fully harden before storing or freezing cookies.

Store uncovered or loosely covered – due to high moisture content, these can get mushy and the glaze may dissolve into the cookie if tightly covered.  Freeze well -  flash freeze on a cookie sheet (uncovered), then transfer to bags or containers for  longer term freezing. To thaw, place on plate and thaw at room temp. I would recommend freezing unglazed, and making the glaze fresh.

Yield:  two dozen large cookies (use tablespoon to drop cookies) or three dozen small cookies (use teaspoon to drop cookies).

Monday, December 12, 2016

Long Life Veggie Soup

By Pam Hadder

I have enjoyed making minestrone soup for many years. This vegan recipe is adapted from a recipe found in  Woman's World magazine, and it originates in Sardinia, the Italian island which is known to have the most centenarians in the world!  Apparently the locals of Sardinia attribute their long life to this wholesome vegetable soup.   The flavour is amazing -even better when I have my own fresh herbs (parsley, basil and oregano) from the garden.  But in the winter, I have to be content with dried herbs.  Serve it over fresh pasta and grate your favourite vegan cheese over top.  I hope you will try and enjoy this simple, delicious recipe - I think the deal maker with this recipe is the fennel, so don't leave it out xox

Long Life Veggie Soup

Ingredients:
1 can (approx. 19 ounces) white beans
1 can (approx. 19 ounces) chick peas

1/3 cup extra virgin olive oil
2 medium cooking onions (yellow onions), chopped finely
5-6 cloves garlic, finely minced
4 large potatoes, peeled and diced in 1/2" chunks

4 large carrots, peeled, quartered and chopped in 1/2" pieces
4 ribs celery, chopped finely
1/2 large fennel bulb plus 3 stalks fennel, chopped in 1/2" pieces
2- 28 ounce cans diced tomatoes
1 cup chopped fresh herbs - Italian parsley, basil and oregano

(or 3 Tbsp. dried herbs - 1 Tbsp each of the above herbs)
2 tsp. sea salt

Fresh ground black pepper to taste
4-6 cups water, depending on desired consistency

Other: fresh cooked pasta (oiled and or buttered - vegan butter); grated cheese

Method:

Add the oil to a large soup pot over medium heat.  Add in the chopped onion, salt and black pepper, stirring occasionally, loosely cover and cook onions until soft and translucent (about 7 minutes).  Add in the garlic, potatoes, carrots, celery, fennel and stir occasionally; cooking loosely covered for another 20 minutes. Add in the tomatoes and enough water to ensure all veggies are covered.  Reduce heat to medium-low or low, and cover tightly to simmer for 15 minutes.  Add in the herbs and canned beans, including the liquid from the beans - no need to rinse. Simmer another 10 minutes to heat through. Serve over a large scoop of hot, buttered pasta and garnish with grated cheese.

NOTE: this soup freezes very well; just reheat, make some fresh pasta to accompany it, and you are set. Also delicious on its own, but the pasta is a great addition.  I have substituted dill for the oregano and basil for a change - when I have had some awesome fresh dill on hand; it is also really wonderful. When using the dill, try cooking some basmati rice instead of the pasta as an accompaniment.

Sunday, December 4, 2016

Pam's Black Bean Chili

By Pam Hadder

As a kid, winter Saturdays were chili bowl days!  With a big family and everyone going their separate ways, Mom would make a big pot of chili accompanied by a large bag of fresh, crusty rolls from the local Coop bakery; and the chili would be simmering all afternoon for those who were hungry.  Sometimes Mom would also have plain, buttered noodles or grated cheese to add in.  Mom’s chili was more of a thick soup consistency, versus the porridge-like consistency that is more common with southern USA chili recipes.
  
Inspired by those memories, I have made a vegan, black bean chili, served with pasta and garnished with vegan sour cream and vegan smoked gouda cheese.  I found the smokiness of the gouda to be a nice addition – hope you will try this easy, bold-flavoured favourite of mine – it freezes well and is packed with veggie protein and spicy heat to satisfy and warm you through to your toes.  Enjoy in good health xox!


Pam’s Black Bean Chili

Ingredients:
¼ cup extra virgin olive oil
12 ounces extra firm tofu, crumbled with hand to consistency of ground beef
1 large can black beans
(or 1-1/2 cups dry beans, soaked overnight, drained and par-cooked)
1 large can diced tomatoes
1 small can tomato paste
2-/12 tsp. ground cinnamon
½ tsp. sea salt
3 Tbsp. chili powder
2 tsp. fresh ground black pepper
3 Tbsp. granulated sugar
2 tsp. crushed red chilies
2 medium cooking onions, diced
3-4 cloves garlic, minced
2 large green bell peppers, chopped in ½” chunks
3 cups water, or more/less to desired thickness

Add-ins, Add-ons:
-Fresh cooked pasta of choice (I like rotini), lightly buttered with vegan butter or mix of olive oil and vegan butter
-Grated vegan gouda, or other favourite vegan cheese (garnish)
-Vegan sour cream (garnish)
-Other: mushrooms and corn are nice additions to the chili; other great toppers are diced black olives,  chopped chives, green onion or cilantro.

Method:
Heat ¼ cup olive oil over medium heat; add in tofu, stirring often to prevent sticking – cook 7-10 minutes until tofu is lightly golden.  Add in onions, garlic, sea salt, black pepper, cinnamon and crushed chilies, cooking  covered another 5-7 minutes, until onions are softened and translucent – you may need to reduce heat to medium-low or low, depending on your cookware and range.   When onions are soft and translucent, add in bell peppers, tomatoes, canned beans (including broth – no need to rinse), tomato paste, sugar, chili powder,  and water; bringing to a boil, stirring often to combine ingredients.  Reduce heat, loosely cover and simmer for 35 minutes.  Serve over a scoop of buttered pasta, garnishing with grated gouda and sour cream.

Note: if you wish to add other veg to the chili, such as corn, or mushrooms, they should be added with the tomato, bean,  and green peppers; etc., after the onions are soft and translucent. Other beans and legumes can be added or substituted for the black beans, depending on your preference and also what you have on hand in the pantry – some suggestions are pinto beans, kidney beans, or brown lentils. Fresh, raw corn is also a nice garnish, add-in. Other types of fresh peppers are also nice in addition or in place of green bell peppers; and depending on availability.

Tuesday, August 30, 2016

Vegan Summer! Traditional Plum Cake


By Pam Hadder

The arrival of prune plums from British Columbia is a luscious reminder of late summer's bounty.  For me it conjures memories of riding my bike down dusty gravel country roads and feasting on pflaumenkuchen (German plum cake) at a family friend's farm house.

I'm told that kuchen is the official state dessert of North Dakota, but the sugar-and-baking powder-laden recipes I've seen to support that claim are unlike the yeast-dough based version I knew and loved as a kid.  Although my Mom is of German heritage, her Russian mother never made kuchen in the home.  But Mom recalls that many of her relatives made it, using fruits in season.  

My favourite is the plum kuchen, pflaumenkuchen - like much European baking, it is not overly sweet, and this allows the fruit to shine, and you can enjoy it's natural sweetness.  Of course, I searched numerous online resources and "veganized" my recipe to eliminate eggs and dairy.  The result was absolutely delightful, and dear Mom is still talking about it over a week later!  Hoping you will try this recipe and enjoy it in the very best of health. xo

VEGAN SUMMER-TRADITIONAL PLUM CAKE
(Pflaumenkuchen)

Ingredients - Dough

1 pkg active dry yeast (2-1/4 tsp)
1/4 cup warm water, with 1 tsp sugar
2 flax eggs or other vegan substitute (I use Bob's Red Mill)
1/4 cup white sugar
1 cup soy or almond milk
1/2 cup vegan butter (Earth Balance baking sticks)
3 cups all-purpose flour
1 tsp sea salt
1/4 ground mace, or nutmeg
Zest of one lemon
Few drops canola oil

Ingredients - Streusel Topping
1-1/2 to 2 lb pitted, halved fresh prune plums
1/2 cup sugar
1/4 cup plus 2 Tbsp. all-purpose flour
1 tsp. cinnamon
Pinch of sea salt
2 Tbsp. vegan butter or soft vegan margarine (I use Becel, vegan)

Method:
Add pkg yeast to 1/4 cup warm water with 1 tsp. sugar added; let stand 10 minutes. Prepare egg subs and gradually beat in the 1/4 cup of white sugar, beating until well combined and frothy (1 minute, with hand whisk). Place 1/2 cup vegan butter and soy/almond milk into a medium microwave-proof bowl and heat 4-5 minutes on med-high power to melt the butter into the milk - remove from microwave and allow to cool 15-20 minutes at room temp. Once milk mixture is lukewarm, combine 1 cup of the flour along with the vegan egg subs and yeast in a large bowl.  Add in the milk mixture along with the lemon, mace, salt and the remaining flour.  Stir briefly with a sturdy spoon to combine the dough ingredients.  When a ball starts to form, gently knead and combine the ingredients with your hands.  Turn the dough out onto a smooth surface and knead for 4-5 minutes, until smooth and elastic.  Place dough in a lightly oiled large bowl. Wet a clean cotton tea towel and wring it out thoroughly, cover the dough in the bowl with the damp towel - towel should not touch the rising dough. Set dough aside and allow to rise - about 45 minutes. During this time, halve and pit the prune plums; set aside. Prepare the streusel topping also, combining sugar, flour, salt and cinnamon in a medium bowl, and cutting the margarine in with a fork or pastry blender to resemble coarse bread crumbs; set aside.

Portion the dough in half and press into two 9" round cake pans - dough will be about 2" thick, just pat it into place as evenly as possible, creating a slight ridge on the perimeter of each to form a crust ring around the fruit. Arrange fruit by pressing the cut side down into the dough - dough will make squishy sounds as you push the fruit in, be sure to push them in quite firmly :) Using your hands, spread the streusel over the fruit.  Cover your cakes very loosely with plastic wrap (you don't want to lose that delicious streusel to the clingy plastic!). Allow to rise 45 minutes, preheat oven to 350 degrees Fahrenheit and bake cakes for 30 minutes.  Delicious right out of the oven with a dab of vegan ice cream or as-is - good cold and also freezes well.  Any leftover plums (pitted and halved) can be frozen for later use also.  Try substituting other fruit in season - apples, berries, peaches; etc.

Yield: two nine-inch round cakes - recipe is easily halved :)


Tuesday, August 9, 2016

Vegan Chocolate-Walnut Biscotti

By Pam Hadder

Italy and I have this “thing” going on – well, at least I am certainly smitten, but she may care less, lol!  The cooler temps today are reminding me of my visit to Toscana in March 2010 with my son, Kelsen, and FC.  Kelsen was only nine years old, and it was such a treat to stop by a friend’s Firenze cafĂ© and enjoy  espresso and a glorious assortment of fresh-baked biscotti.  Kelsen had frothed milk and honey.

Fortified from a long day of travel and instantly converted to all tastes Italiano, we faced the raw March air with renewed energy. I have been delighted to find many vegan biscotti recipes over the past years (I have been vegan since March 2012), and thankfully many vegan cooks and bakers share their tips and methods online. This recipe has been a favourite, and has been adapted from a number of online recipes - bake these one restful afternoon and please enjoy in the best of health xo

Ingredients:
Makes about 50 biscotti
1 cup walnut halves (or pecans, hazelnuts)
2-1/2 cups spelt flour, plus more for dusting the work surface
½ cup baking cocoa
3 Tbsp. espresso coffee (extra fine ground, dark roast coffee)
½ tsp. baking soda
¾ tsp. baking powder
Pinch of fine sea salt
4 flax eggs or other egg substitutes*
1 cup firmly packed brown sugar
2 tsp vanilla extract
Cold water as needed

For Chocolate Drizzle:
4 ounces vegan chocolate or chocolate chips
1-1/2 tsp. canola oil
Method:
Make the flax eggs first thing unless you are using ready-made egg subs. Preheat oven to 350 degrees Fahrenheit. Line a large baking sheet with parchment paper. Sift together spelt flour, cocoa, espresso grounds, salt, baking powder, baking soda and set aside. In a medium bowl, lightly beat the flax eggs, beating in the brown sugar gradually until well-blended and fluffy – stir in the vanilla extract. Stir flour mixture gradually into the wet mixture. If the dough seems dry, add some cold water a tablespoon at a time until it binds properly. I used 4 tablespoons of water the last time I made these – the variation depends on the quality of flour, cocoa, and other factors like humidity and the accuracy of measurement.  

Divide the dough in half and place one portion on a lightly floured surface – with lightly floured hands, pat the dough into a 6” square. Scatter half of the walnuts on the dough, pressing them into the surface. Roll the dough into a cylinder about 2” in diameter and 12 – 15” in length.  Place the roll on the prepared baking sheet, and repeat process with the second portion of dough.  Brush tops of both rolls with water, using a pastry brush.  Place in oven and bake 15-20 minutes, until firm to the touch. Transfer to a large cutting board, allow to cool for 5-10 minutes, and cut with a sharp, non-serrated blade into ¾” slices. Replace cut slices on the prepared baking sheet with cut interior surface facing up, and return to oven. Bake for an additional 20 minutes, flipping the biscotti midway. Finished biscotti will be crisp and dry on the exterior. Remove from oven and allow to cool completely before drizzling with chocolate. 

To prepare the drizzle, measure chocolate and oil into a small microwave-safe bowl and heat on medium power for 2-3 minutes, checking and stirring at one minute intervals for the first two minutes, and every 15 seconds thereafter – you want to avoid scorching the chocolate. All pieces may not liquify, but if you remove the chocolate, and stir, it will become smooth in a few seconds. The drizzle can be spooned over the biscotti, or it can be brushed onto the flat sides.  Allow chocolate to set before storing in a loosely covered glass jar.

Note: I like my biscotti on the softer side – I’ve tasted some that are like a rock! If you find your finished biscotti are too dry, pop them into a plastic storage container with a tight sealing lid; they will soften in a day or two – until then, dunk them in some tasty espresso or cappuccino or…

*Pureed prunes, mashed bananas and apple sauce all work as egg subs for this recipe – they are all great vegan binders, but I find the flax eggs work best and enjoy the flavour the most.

"Jacked" Vegan Bean Pot

By  Pam Hadder
I recently was gifted two vintage ceramic bean pots – my dear friend, Sharmila, is an avid aficionado of vintage and unusual cookware (search Facebook, Kitchenware – Traditional and Unusual).  I had no familiarity with bean pots, but Sharmila’s enthusiasm sparked my interest.  Searching online I found a number of “recipes” for microwave cakes and such, not the slow-cooked, from scratch options I was interested in.
 
I also found a wide variety of opinions on how to soak and prepare beans!  One seemingly reputable government site suggested adding oil to the cooking water, while others suggested a adding a pinch of baking soda.  One home economist suggested cold water pre-soaking for up to 48 hours!  Initially I tried the most common cold water soak, soaking overnight – using the covered bean pot as my soaking vessel, and with the addition of one teaspoon of salt.  This morning, I par-cooked the soaked beans as directed by a few online resources – adding two tablespoons of olive oil and simmering 45 minutes. The aroma was lovely, but the resulting beans were so soft, they were ready for white bean hummus or puree, not bean pot baked beans!  I cooled and bagged them to freeze for later use.

Very glad that I had a second bag of dried navy beans, I started fresh – seeking online information for cooking without overnight soaking. The following is my result – a culmination of conflicting online information, with the added zip of some Jack Daniels whiskey, chilies, bell peppers and fried, smoked tofu to make these vegan bean pot beans really special.  I hope you will try and enjoy, trusting that I have taken care of the leg work for you :)

Ingredients:
450 g/1 lb dry navy beans (no need to presoak)
210g/8 ounces smoked tofu, finely chopped, and seasoned
¼ cup olive oil, divided use
1 large yellow onion, chopped finely
1 large red bell pepper, chopped finely
1 tsp. sea salt
1 tsp. ground black pepper
1 tsp. crushed red chilies
1 teaspoon dry mustard
½ cup black strap molasses
½ cup brown sugar
¼ cup ketchup
1 tablespoon prepared yellow mustard
½ cup Jack Daniels whiskey
2 cups tomato juice (or orange juice)

Method:

Place beans in large soup pot, cover with four inches of water and bring to a boil over med-high heat.  Boil for 3 minutes, remove from heat (I set on back burner, no heat on), cover and let stand 40 minutes. Meanwhile, sautĂ© the chopped onion with bell pepper in 2 tablespoons of the oil until onion is soft and translucent.  In another skillet, brown the chopped tofu in the remaining oil, stirring often.  Season the tofu to your taste with a little salt and pepper – this becomes the “bacon” for your beans.  Drain the beans, rinsing thoroughly with cold water. 

Measure four cups of the beans back into the soup pot. Add the crispy tofu, sautĂ©ed onion, and the remaining ingredients.  Stir to combine with a wooden spoon. Ladle the mixture into a 6-cup bean pot. Preheat the oven to 300 degrees Fahrenheit, making sure you have adequate clearance for your bean pot, and adjusting the racks if necessary.  Place the bean pot into the oven and bake for 4-6 hours, checking for doneness at four hours.


You may also wish to add more tomato or orange juice if the beans are still too firm, and extend the baking time accordingly until the desired texture is achieved. I reduced the temperature to 280 Fahrenheit and baked for a total of 7 hours. The baking time can be extended from the onset by reducing the heat to 275-280 degrees and planning for  an 8-10 hour baking time – so by cooking at a slightly lower temperature, beans could go in just before bedtime, and could be warm and ready in the oven for an amazing breakfast or brunch!  

Sunday, November 16, 2014

Nirvana Black Bean Burgers

By Pam Hadder

The quest has ended!  After years of making so-so black bean burgers, I have found the perfect combo of ingredients to produce a moist, flavourful patty - this truly is black bean burger heaven, hence the name: Nirvana Black Bean Burgers.

The best part of this whole situation - they are super easy to make and require no unusual or hard-to-find ingredients.  Another wonderful aspect is how amazing the aroma is when they are baking!  Once baked and cooled, I individually bagged and froze these - then you can pan-fry, BBQ or microwave, depending on your time and preferences.  A quick and easy option is to microwave to thaw (1-2 minutes per patty), and then broil in the toaster oven to get a nice crispy, brown exterior - I place the patties on a square of foil and flip mid-way when preparing them in this way - also great way to add melted vegan cheese, mmmm. Hope you will enjoy making these yummy vegan burgers - my recipe was adapted from many recipes I have tried over the years, and I am so happy that I finally found ingredients and proportions that work for me - in the past I found many bean burgers too bland or very dry xox


Nirvana Black Bean Burgers

Makes 12 patties - approximately 4.5" across and 1/2" thickness

Ingredients:
2 cans of black beans, well rinsed and drained
1 medium cooking onion
8 baby carrots, or one large carrot
1 small bell pepper - any colour
(I used yellow)
2 Tbsp. fresh crushed garlic, or approximately 6-8 cloves
6 Tbsp. chili sauce, ketchup or Sriracha sauce (chili for sweet 'n spicy, ketchup for milder flavour, and Sriracha for extra garlic and fire!)

2 Tbsp. corn starch
2 tsp. chili powder
2 tsp. ground cumin
1 tsp. ground black pepper
1/2 tsp. sea salt

1/2 tsp. seasoning salt
1 cup wheat flour or ground spelt
Approximately 1 cup, fine bread crumbs* 
(I use Pastene brand, seasoned bread crumbs, but you could use any type, or even crush your favourite healthy crackers!)
Method:
Preheat your oven to 350 degrees Fahrenheit. Line two baking sheets with parchment or wax paper, and spray lightly with vegetable oil.  If you don't have veg oil spray, just put a few drops of oil on your hands and lightly spread it over the parchment.

Mash the beans in a large bowl with a potato masher - I don't recommend blending or processing unless you have a really good appliance; you want the beans to be a bit coarse, not like a purĂ©e - this makes for a nicer texture.  Next place the onion, carrot, bell pepper, and Sriracha (or ketchup, chili sauce) into the blender - buzz until smooth.  In a small bowl, combine the cornstarch, chili powder, cumin, pepper, salt, seasoning salt, and flour - mix together to combine.  Add the wet mix from the blender to the mashed beans alternating with the dry spice and flour mix, then add in enough of the fine bread crumbs to make a good consistency for patties. For those of you that have worked with ground meat, the bean mixture will be slightly moister than meat-based burgers - this is how it should be. Add just enough crumbs to allow the mixture to bind together - no bits should be falling out.  *NOTE: it is hard to give a precise measure on the bread crumbs, as the size of the veggies and their moisture content will vary - you just have to get a feel for the right consistency - trust in your abilities and know you are very close to one kick-ass vegan burger!  

Using a small serving spoon or a tablespoon, scoop out about 1/3 to 1/2 cup of the bean patty mixture and plop it on the prepared baking sheet - pat it into a circle or square about 1/2" thick and smooth the edges with your finger tips.  Place the patties about 2" apart on the sheets. Bake for 12-15 minutes, flip patties and return to bake second side for another 12-15 minutes. 

These are amazing as a traditional burger on a bun, or on top of a crunchy salad, or just as-is for a quick protein fix. Hope you will try and enjoy - they are really just so yummy!  xox

Saturday, November 1, 2014

Eggless!

By Pam Hadder

For so many years I choked down eggs – they grossed me out, but I was told they were good for me!  In my early 30s eggs were a big part of low-carb dieting that allowed me to keep my weight down even when work and family demands kept me from engaging in the physical activities I had once enjoyed.  Looking back, eating all of the meat and eggs was soul-less for me – most of the time I was politely swallowing while trying to distract myself from the dead animal realities. It was functional and disengaged consumption.

Now I have been dairy-free for over 14 years and vegan for about three years and eggs are one thing I do not miss.  Having not eaten them in so long, the sulphurous odor is really repulsive for me when I am in a restaurant, or when one of my kids is cooking them!  Yes, I live among omnivores but for me, "scrambled" silken tofu with veg has become my weekend breakfast treat - great in a vegan crepe, with toast, or solo. Although I am a vegan, I am not an enforcer type – it is my choice not necessarily theirs, and I do not preach to my kids about my choices; they always have omnivorous options as they choose without my judgement.  I still make my son his “love eggs” (basically scrambled with LOTS of butter, lol), but I feel good about the choices I make daily with my diet

And although I recognize my choices are not those of the majority, I do share my vegan recipes and tips in the hope that a few folks will consider Meatless Mondays or will sub some vegan meals into their diet.  Vegan eating is heart-smart, is a natural fit for those of us that love all animals, and may contribute to the betterment/sustainability of Earth’s ecosystems.

Another concern of those wanting to go egg-less is all of the recipes that call for eggs – for baking, this is an easy fix.  Here are a few options to substitute for one large egg in any muffin, cake or cookie recipes.  You will find that most family favourites can be converted with great success and with equal or improved taste:


One small banana mashed = one lg. egg
1/3 cup unsweetened apple sauce = one lg. egg
1/3 prune puree = one large egg
1 Tbsp. ground flax or chia seed and 3 Tbsp. water = one lg. egg
(NOTE: cover flax/chia mixture and chill 15 minutes prior to use)

Additionally, Bob’s Red Mill foods sells an egg replacer that works very well in many recipes without altering the flavours.  Prune and flax eggs do have distinctive flavours, particularly for those new to these ingredients – therefore, you will want to use them in recipes that have strong flavours like chocolate or spice (i.e. ginger snaps, brownies) to avoid having the flax or prune overwhelm the recipes.  Chia is perhaps the most neutral of the homemade options, and Bob’s Red Mill’s is a great option for those who don’t want to fuss with grinding their own flax or chia seeds.  Bob’s is made with flax, but their process neutralizes any strong flax flavours.

Many other ingredients, such as potatoes, oatmeal and agar agar naturally serve as binders so you may need to surf the web and try some recipes posted by vegan cooks. Some recipes just need a bit more oil to compensate for the absence of animal eggs.  I will admit, some vegan recipes I have found online and tried were duds, but the vast majority were just amazing.  Here is a link to PETA’s site with several more options for replacing eggs in your recipes.  Enjoy in excellent health xox

Monday, September 29, 2014

Oaty-Carrot Cookies

By Pam HadderThis recent vegan cookie experiment was a home-run with my young son (my resident cookie expert), so I am making sure I share this with you while all my proportions and ingredients are fresh in my mind!

After trolling the Internet to find a good new oatmeal cookie indulgence, this resulted.  Many of the recipes that looked interesting were not vegan, and many of the vegan ones had tired/bland flavour profiles.  The addition of carrot adds a muffiny moistness to this recipe - and the cinnamon glaze (optional) contributes a cinnamon bun-like hit of sweetness (as if you aren't sweet enough, awww.....).  Happy baking - hope you will enjoy these in good health xox.


Pam’s Oaty-Carrot Cookies

Ingredients for cookie dough:
1 cup quick oats
1-3/4 cups all purpose flour
½ cup sugar
¾ cup brown sugar
1/8 tsp. sea salt
2 tsp. cinnamon
½ tsp. ground cloves
1 cup dried cranberries (or other fav dried fruit)
¾ cup chopped walnuts
½ cup toasted, flaked coconut* (crushed) – you could use any coconut here!
1 tsp. baking soda
½ tsp. baking powder
Egg replacer for two large eggs**
3 tsp. vanilla extract
1 cup coconut oil, melted and cooled (should be warm but not super hot!)
2 cups finely grated carrot (I use my steel zester for this – really fast and nice, fine gratings)


Ingredients for cookie glaze:
1 cup icing sugar
1 tsp cinnamon
2-3 Tbsp. of hot water

(**I purchase the toasted coconut flakes at Costco – very intense toasty flavor!  You could also toast your own - just place the coconut in a nonstick pan over med-low heat; stir constantly until browned – you need to stir or it won’t toast evenly and bits will burn.)
(*I used Red Mills Egg Replacer, but 2/3 applesauce or one medium-sized mashed banana would also work for this recipe.)

Method:
Preheat your oven to 350 degrees Fahrenheit and line three baking sheets with parchment paper or wax paper. Combine all dry ingredients in a large bowl: flour, sugars, salt, baking soda and baking powder, spices, coconut and cranberries.  In a medium-size bowl, combine your egg replacer (for two eggs – or use one banana; or 2/3 cup unsweetened apple sauce), cooled coconut oil and vanilla extra – stir to combine.  Add the grated carrot to the wet ingredients, stirring once more. Pour wet ingredients into dry and stir just to combine – this forms a firm yet moist cookie dough.   Scoop out rounded tablespoons of dough and place the mounds on the prepared baking sheets, about 2” apart.  Try to make the mounds a consistent size so that you have evenly baked cookies in the end!  Bake on the centre rack of your oven for 15 minutes – depending on the moistness of your carrots, you may need to adjust the time plus or minus 3-5 minutes.  I recommend checking them around minute 12, and I always bake a “test cookie” – my son is the happy tester/baking expert!  If it passes his scrutiny, it’s a winner, lol! 

To make the glaze, stir the cinnamon into the icing sugar and gradually add the hot water to form a thick syrup consistency -drizzle this over the cookies while warm.

This recipe yielded 3.5 dozen cookies for me, but it will depend on the size of your scooping!  Enjoy xoxo

Tuesday, September 2, 2014

Summer Harvest Soup

By Pam Hadder

I love soup - no matter the season, to me, no meal says comfort quite like soup!  Soups are typically quite fast and economical to make - it's great to improvise with what you have on hand, or to suit what is available in the garden or your local market.  Tonight I was craving something savoury, but was feeling exhausted.  However, I am glad I dragged my butt into the kitchen, because in less than an hour, this soup recipe was ready and I had a very happy tum :) Good soup just sets your heart right, you know what I mean?

This vegan acorn squash soup makes use of some of the early summer harvest: local carrots, celery, onions and baby potatoes along with a less typical blend of seasoning.  There are also some options provided to help you create your own signature version - very easy to add or sub other fresh veg based on what you have available. I enjoyed my serving with rye toast and sliced tomatoes on the side - hope you will try and enjoy xox

Ingredients:
1 medium-size acorn squash

2 Tbsp. coconut oil
1 medium cooking onion, finely chopped
3 medium carrots, peeled and thinly sliced
2 ribs celery (or four leafy ribs from the heart), chopped thinly
12 baby potatoes, washed and chopped in 1/2" pieces

2 cloves fresh garlic, finely minced or pressed
3-4 cups vegetable stock (or water, but stock is preferred)
2 rounded Tbsp. whole grain mild mustard (I like Maille brand, L'Ancienne Old Style Mustard)
1 tsp. dried basil
1/2 tsp. sea salt

1/2 tsp. dried crushed red chilies
Fresh ground black pepper to taste (I use about 1/2 tsp.)

1 can of coconut milk (approx. 1.5 cups)

Method:
Wash the acorn squash and cut it in half, scooping out the seeds and stringy pulp.  Place the halves cut-side down on a large plate, adding a couple of tablespoons of water and covering tightly with microwave-safe wrap.  Microwave for 15-17 minutes - a sharp knife should easily pierce through the skin when the squash is ready.  Cooking time may vary depending on your microwave and the size of your squash.  While the squash is cooking, melt the coconut oil over medium heat in a large covered saucepan.  Add the onion, carrots, celery and baby potatoes; stirring intermittently, cook for about 10 minutes (onion should be clear and vegetables should be par-cooked but not mushy. Add in the garlic and cook 3-4 minutes longer, stirring as needed.  Stir in the salt, pepper, chilies, basil, mustard and vegetable stock, bring to a simmer and reduce heat if mixture begins to boil. Continue to simmer until the squash is ready.  When the squash is cooked, scoop out all of the flesh into a medium bowl and mash it coarsely with a fork or potato masher. Add all of the squash to the soup mixture, and stir in the coconut milk.  Continue to simmer for 5 minutes - serve and enjoy.


Options:
I like a rustic, chunky texture to my soup, but if you prefer a velvety texture, this soup can be blended using a counter-top blender or immersion blender. Alternatively, you can scoop out half of the soup, blend it and add it back to the chunky veg in the saucepan (compromise between purĂ©ed and chunky, lol!) Some great add-ins or substitutions for the veg ingredients would be finely chopped broccoli or cauliflower (about one cup); or fresh corn off the cob (peaches and cream, mmm - just use a small knife and scrape those kernels into the pot!). Add these optional veggies with the onion, celery etc. when you sautĂ©. Also, depending on how long the soup simmers and your personal preference for consistency, you may wish to add a bit more broth.  

Monday, February 17, 2014

Cran Banana Biscuits

By Pam Hadder

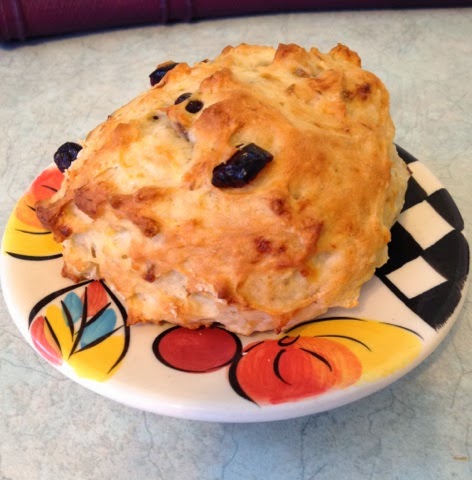
I have had this tea and biscuits theme running through my brain - must be the winter doldrums!  So this morning I decided to make some tea biscuits. I found a very simple recipe with flour, oil, bananas and soy milk - it seemed interesting, but with 4-1/2 cups of flour and no salt, no fruit etc, these seemed pretty heavy and Spartan - survival food! So my
Cran Banana Biscuits were born - I rev'd up the flavour, increased the fat and reduced the flour to a modest three cups et voilĂ ... the BEST part, these don't have to be kneaded or rolled out/cut; just drop from a spoon and bake.  Hope you will try and enjoy with your favourite hot cuppa xox


Pam's Cran Banana Biscuits

Ingredients:
3 ripe bananas, mashed well
1 cup dried cranberries
1 cup soy milk
2 tsp. apple cider vinegar
1/4 cup canola oil
zest of one orange (or lemon)
1/2 tsp. salt
2 Tbsp. sugar
3 cups flour
1 Tbsp. baking powder


Method:
Preheat your oven to 425 degrees Fahrenheit and line two baking sheets with parchment paper (or lightly oil with vegetable shortening). Place the soy milk in a small bowl and stir in the apple cider vinegar - set aside; this will curdle and thicken slightly.  Place the mashed bananas in a large bowl and stir in the cranberries, oil and zest.  In a medium bowl, combine the flour, sugar, baking powder and salt.  Add the milk mixture to the bananas and beat well until creamy.  Dump all of the dry ingredients into the wet mixture and stir just enough to combine - don't want to beat it, but you don't want floury bits either ;)  Using two tablespoons, scoop about 1/3 cup of the batter at a time onto the prepared baking sheets, allowing about 2" between each biscuit.  The batter will be moist, but it holds its shape in soft mounds.  Bake for 20 minutes - biscuits will be golden brown on top and moist/flaky inside.  Enjoy with vegan butter and fruit, or your favourite fruit preserves - I love my homemade, vegan strawberry freezer jam (sugar free and yummy!). xox


Sunday, February 16, 2014

Cheesy Vegan Fondue!

By Pam Hadder

For a lot of potential vegans, the hardest thing to imagine is life without cheese!  For me, it was butter, but then I discovered the marvels of coconut oil and other veganlicious delights. Nonetheless, when I received a vegan cookbook for Christmas and discovered a cheese fondue recipe in it, I was so excited - what could be nicer on a winter weekend than a leisurely, luxurious, cheese fondue accompanied by a crisp green salad and some excellent wines? So I had to try that recipe straight away!  The first thing that struck my attention was that the recipe did not include any vegan cheese - what the...???  How was this going to work? But I stuck with it, and a baguette and bottle of wine later...well, it was an amazing feed and I would never of known it was vegan.  I have made some adjustments to the excellent recipe, however - reduced the salt and completely replaced the water with wine (duh - that's a given!).  This fondue is easy to make and will serve 6 for a hearty appetizer or snack; if you combine with a big salad, you have a wonderful meal for four. Whether you are vegan or just looking for healthier alternatives from time to time, I hope you will indulge in this amazing fondue experience xo!

Pam's Cheesy Vegan Fondue

Ingredients:
1 clove fresh garlic, cut in half
1-1/2 cups white wine (something sweet and fruity - but not too sweet)
4 Tbsp. coconut oil, melted

1 tsp. sea salt
1 tsp. Marmite (or miso paste)
2 Tbsp. apple cider vinegar
1/4 cup nutritional yeast flakes
1/8 tsp turmeric (for colour)
1 cup raw cashews
3 Tbsp. cornstarch
1/2 tsp. granulated garlic
1 tsp. onion powder

Method:
Prepare the fondue pot by rubbing the inside thoroughly with the cut garlic halves- discard the left-over garlic pieces
. Place 1/2 cup of the wine to the side, and put all remaining ingredients into a blender, buzzing until creamy smooth (about 3 minutes). Heat the fondue pot to low, add the reserved 1/2 cup of wine to heat through. Pour in the blender mixture and continue to heat on low, whisking gently to avoid clumping/burning. The fondue will thicken in about 7-10 minutes. Dim the lights, cue the dreamy music and start dunking that bread!  Delicious!

Note: fondue can be prepared ahead on stove-top and reheated - will keep in the refrigerator for 3-4 days. xo


Monday, January 13, 2014

Cleopatra's Sweets

by Pam Hadder
Right now my son is doing a school project on Egypt, and each member of his group is contributing by making something as it would have been done back in the time of the Pharaohs - well, they are each approximating that task, and kudos to them!  My little guy came across a sweets recipe that is an authentic take on honey-poached fruit and nut balls that were a favourite of Cleopatra. Packed with nutrition and served with whatever fresh fruit was in season (pomegranates are suggested) these little morsels are easy to make! Not only have they have inspired his imagination, we had fun making them together and talking about how the ones made thousands of years ago would have been different - the coarseness of the hand-ground flours, and so on. We enjoyed sampling them too, so I thought I would share the recipe with you - they are even vegan-friendly.  Well, let me rephrase that, because some vegans don't eat honey - I am guessing you could substitute corn syrup, if that is the case with you :)  I am one of the vegans that eats a small amount of honey - it is a nutritional powerhouse, and my great-grandfather kept bees, so I suppose it's in my genes.  Did you know that honey is the only food that does not expire? Maybe Cleopatra thought it would keep her young and lovely from the inside out?  She was known for her beauty and her wisdom, that's for certain! 

Cleopatra's Sweets

Ingredients:
1 cup whole wheat flour
1/2 cup cold water
1/2 cup chopped dates
1/2 cup chopped walnuts
About 1-1/2 cups organic, unpasteurized golden honey
Fresh fruit in season - we used pomegranates

Method:
Chop the nuts and dates and place in a medium-sized bowl with the flour, stirring to combine well. Gradually stir in the water, mixing to form a firm but moist dough ball - you may have to add a slight bit more water or flour to get it just right.  Cover the dough and set aside for 10 minutes. Using two spoons or lightly moistened hands, shape the dough into walnut-sized balls - don't roll, just gently pat into a round-ish shape, placing them on wax paper that has been lightly oiled or sprayed with Pam spray. Put the liquid honey in a small sauce pan and turn to medium-high - it will come to a frothy boil.  Reduce the heat slightly and place the dough balls into the honey to poach, turning them gently with two spoons - they need to cook for 8-10 minutes. Poach about 6-8 balls at a time - this recipe will make about 14-16 balls. When the balls are cooked, remove from the honey and set on a plate to serve. Garnish with fresh fruit and enjoy!  Oh, and save any leftover honey to sweeten other dishes - it gets darker and thicker, but is still usable.

I understand the Egyptians loved their homemade beer, but these would be lovely with coffee or tea. Next time we make them, I might add a dash of cardamom or cinnamon to the honey - not sure how authentic that is, but I think it would be a nice variation. 

Hope you will try and enjoy xox

Saturday, November 2, 2013

Lemony Tea Cookies

By Pam Hadder

'Tis the season!  Before we know it there will be snow and ice and carols playing everywhere we go. Thus, while I have a few free moments, I am looking over a few good recipes for holiday baking and what I have found is that most of my "family favourites" can be easily adapted to fit the vegan diet.
This recipe for vegan Lemony Tea Cookies was created from a basic sugar cookie recipe I found online a couple of years ago.  These cookies are buttery (without real butter, naturally!) and so satisfying, AND the lemon is a refreshing change from the over-abundance of heavy, chocolate, caramel and mint flavours we typically see during the holiday season. These cookies are easy to adapt to suit your favourite tastes or what you have on hand - for example, chopped pecans and orange zest could be substituted for the lemon, or why not make them with lime zest and lime juice?  Happy baking - hope you enjoy these in good health xox  


Lemony Tea Cookies - Vegan

Ingredients:
1-1/2 cups powdered sugar

1/8 tsp. salt
1 cup coconut oil, softened* (not melted - coconut oil is solid at room temp)
1/4 cup soy milk
1-1/2 tsp. lemon extract
zest of one lemon
1-1/2 cups all-purpose flour
2 Tbsp. corn starch
1 tsp. baking soda
1 tsp. cream of tartar
*vegan margarine could also be used - personally I love the buttery flavour of coconut oil, but both work just great.  I recommend Earth Balance.

Method:
Wash and zest your lemon - if you don't have a zester, a fine steel grater will do. In a large bowl, combine the coconut oil, lemon extract, salt, and lemon zest.  Gradually stir in the powdered sugar and soy milk, beating until light and fluffy (I mix this dough by hand, but you could use a hand mixer also).
Combine the flour, corn starch, soda and cream of tar tar in a small bowl.  Gradually mix these dry ingredients into the creamy coconut oil mixture to form your cookie dough. This dough is quite dry, but depending on your flour and coconut oil, you may need to add up to an additional cup of flour - the finished dough will be similar to pie pastry.  Wrap the dough tightly in plastic wrap and chill in for 30 minutes.  

When ready to bake - preheat your oven to 350 degrees Fahrenheit and begin rolling out the cookie dough (about 1/4" thickness, but experiment with different cutters and thicknesses of dough - a slighter thicker dough yields a chewy, softer cookie, and slightly thinner will make a crispier cookie; both are yummy!).

Place the cookies about 2" apart on a parchment lined cookie sheet and bake for 7-10 minutes - a lighter coloured cookie will be soft/chewy, and a lightly golden cookie will be crispier.  Allow to cool fully before icing.  My Lemony Tea Cookie glaze recipe follows, below.


Lemony Tea Cookie Glaze 

2 cups powdered sugar (icing sugar)
1 tsp. lemon extract
Juice of one lemon
Zest of one lemon
Hot water, as needed

Candy sprinkles or dusting sugar
(optional)


Method:
Zest and juice one lemon. Place the zest and juice in a medium sized mixing bowl along with one teaspoon of lemon extract.  Gradually beat in 2 cups of icing sugar - the consistency should be fluid/creamy but not runny. If the mixture is too thick, or if it thickens while you are working, just add a teaspoon or two of very hot tap water to restore the creaminess. Ice the cookies and sprinkle with dusting sugar or sprinkles - I use Hagel Zucker (German bakers' decorative sugar) because it reminds me of winter snow!). Allow the glaze to dry - it will be shiny in appearance and smooth to the touch.  Store in containers with tight fitting lids, placing wax paper between the layers.  If you are making these in advance, I recommend baking the cookies and freezing them WITHOUT frosting. Then make the glaze and frost them a week or so in advance of serving - these taste even better when the natural lemon oils have had time to permeate.


Sunday, October 6, 2013

Those Little Donuts...

By Pam Hadder

Maybe it's the fall air, but lately I feel the need for a little cinnamon and sugar goodness with my coffee.  Enter the mini donut baker - I stumbled upon this gizmo when running errands for the office and the rest is history :)

Similar to a waffle iron and about the same cost (about $20), the donut baker makes it easy to whip up a batch of vegan mini donuts to satisfy said cravings - with a whole lot less fat and calories.

Sadly, the baker I purchased had only the most basic instructions for use and cleaning and did not include any recipes. So, phase II, I scoured the Internet and vegan recipes apps for some good baked donut batters and ended up adapting a basic donut recipe from the PETA web site to make my cinnamony minis. Here is the recipe - hope you will try and enjoy with a hot cuppa and a friend or two (always better when shared).  

Ingredients:
2 cups all purpose flour
1 cup granulated sugar*
3 tsp. baking powder
1/2 tsp. salt
1 tsp. ground nutmeg
2 tsp. ground cinnamon**
1 cup soy milk
2 tsp. apple cider vinegar
2 tsp. vanilla extract
1 small banana mashed, or 2/3 cup unsweetened apple sauce
1/2 cup canola oil
*Plus an additional cup of sugar for dusting
**Plus an additional 2 Tbsp. of cinnamon for dusting
One clean paper lunch bag


Method:
Combine the soy milk and vinegar - set aside.  The vinegar will make the milk curdle and thicken somewhat. Meanwhile, combine the dry ingredients: flour, sugar, baking powder, salt, and spices.  Add the curdled milk to the oil, vanilla and banana/apple sauce, stirring well to combine. Stir the wet ingredients into the dry to form a smooth batter. Plug in the donut baker and spray it lightly with Pam spray - allow it to heat up in the closed position, then open and wipe away any excess Pam spray. While the baker is heating, combine the extras sugar and cinnamon for dusting the baked donuts - just place the sugar and cinnamon in the small brown lunch bag and shake to combine.

Once your baker is hot and you have wiped away any excess Pam, place a rounded tablespoon of batter in each of the donut recesses.  Close the baker, set your kitchen timer for 2 minutes and 20 seconds - flip the baker and set the timer for another 2 minutes and 20 seconds.  Remove the donuts carefully - I use chopsticks, they work so terrifically and it's fun! Place the hot donuts in the dusting bag and shake to coat.

I have found some other great recipes for baked donuts, including toasted coconut, chocolate and pumpkin/maple glaze.  Will post the recipes as time allows.

Please note, that if you don't have a donut baker, you can also buy donut baking pans - both standard size and mini.  However, the mini donut baker is just great uses a lot less energy than a standard oven.  I purchased my baker at the Real Canadian Superstore and it is President's Choice brand.

Enjoy xox,

Pami